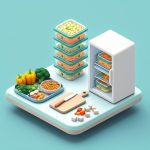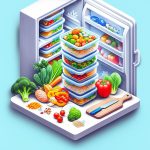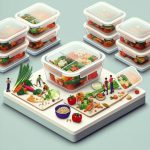
That dreaded 5 PM question—”What’s for dinner?”—can turn a calm afternoon into a scramble of takeout menus and thawing mystery meat. But what if the answer was always ready? Imagine a freezer, neatly organized, holding a diverse menu of delicious, home-cooked options. This isn’t a fantasy; it’s the reality of planning freezer meals for a month, a system that transforms dinnertime from a daily stressor into a simple choice.
This isn’t about buying processed frozen dinners. It’s about investing a few hours on one day to reclaim dozens of hours—and your sanity—over the next four weeks.
At a Glance: Your Freezer Meal Game Plan
- The 4-Week Blueprint: Learn a structured, week-by-week approach to planning, shopping, and prepping a month’s worth of dinners without feeling overwhelmed.
- The Essential Toolkit: Discover the surprisingly simple tools that make a massive difference in efficiency and food quality, from baggy holders to the right kind of pan.
- Prep Day Workflow: Get a step-by-step guide for your big cooking day, using an assembly-line method to maximize your time.
- Storage & Labeling Mastery: Understand the non-negotiable rules for labeling and storing meals to prevent mystery bags and dreaded freezer burn.
- 8 Fail-Proof Recipe Categories: Move beyond chili and lasagna with a list of versatile meal types that are perfect for freezing.
Why a Full Month of Freezer Meals is a Game-Changer
Committing to a monthly freezer meal plan is more than a time-saver; it’s a strategic overhaul of your household management. You’re not just avoiding last-minute cooking; you’re controlling your budget by buying in bulk, reducing food waste, and serving healthier meals with ingredients you’ve chosen yourself.
This approach is a cornerstone of a larger, more efficient kitchen strategy. By batching your work, you create a system that pays you back every single weeknight. For a complete look at how this fits into a broader time-saving framework, see Your Once A Month Cooking Guide. This method empowers you to cook once and eat well for weeks.
Your Four-Week Freezer Meal Blueprint
Tackling a full month of meals can feel daunting. The secret is breaking it down into manageable weekly tasks. This isn’t about one chaotic 12-hour day; it’s a phased approach that leads to a full freezer.
Week 1: The Planning & Recipe Selection Phase
Before you chop a single onion, you need a plan. A great monthly menu balances variety, prep-style, and your family’s tastes.
Your goal is to choose 8 core recipes and double each one. This gives you 16 dinners. Add in a few “freebie” nights for leftovers, pizza, or eating out, and you’ve covered about 20-22 weeknights.
Here’s how a family might map it out:
- List Your Proteins: Pick two recipes each for chicken, beef, and pork/sausage.
- Add Variety: Choose one vegetarian meal and one hearty soup or chili.
- Create Your Menu: Slot them into a simple chart.
A sample menu might look like this:
| Recipe Type | Meal 1: Recipe Name | Meal 2: Recipe Name |
| ——————- | ———————————– | ———————————– |
| Chicken | Lemon Garlic “Dump” Chicken | Chicken Pot Pie Casserole |
| Beef | Make-Ahead Meatballs in Sauce | Smothered Beef Burritos |
| Pork | Slow Cooker Pulled Pork | Lasagna Roll-Ups with Sausage |
| Vegetarian | Sweet Potato & Black Bean Enchiladas | Creamy Macaroni & Cheese |
| Soup/Chili | White Chicken Chili | Wild Rice & Mushroom Soup |
This mix provides different flavors and cooking methods—some are oven-bakes, some are slow-cooker kits, and some are quick stovetop meals.
Week 2: The Strategic Shopping Trip
With your 8 recipes chosen, it’s time to build a single, unified grocery list. This is where the savings begin.
- Consolidate & Categorize: Don’t just list ingredients recipe by recipe. Create one master list organized by store section: Produce, Meat/Deli, Pantry Staples, Dairy, and Frozen.
- Buy in Bulk: This is the time to hit the warehouse club for ground beef, chicken breasts, cheese, and pantry items like canned tomatoes and broths.
- Pre-Prep Your Produce: When you get home, wash and chop all your onions, peppers, and celery at once. Store them in airtight containers in the fridge. This single step will save you immense time on prep day.
Week 3: The “Mega Prep Day” Workflow
This is where the magic happens. Set aside a 4-6 hour block. Put on some music, get the family involved, and work the plan.
- Set Up Your Stations: Clear your counters. Designate a chopping area, a mixing area with large bowls, and an assembly area with your freezer bags and pans lined up. Use baggy holders to keep freezer bags open and ready for filling.
- Cook in Batches (The “Chop & Brown”): Start by browning all your ground beef, sausage, and other cooked meats in a large pot or skillet. While they cook, chop any remaining vegetables. This “component cooking” is far more efficient than cooking one recipe from start to finish.
- Run the Assembly Line:
- Phase 1 (Raw Meals): Assemble all your “dump” meals first. These are the easiest. Add the raw chicken, marinade, and veggies to labeled freezer bags. Squeeze out the air, seal, and lay flat in the freezer.
- Phase 2 (Casseroles): Next, assemble all your casseroles and bakes (Lasagna Roll-Ups, Enchiladas, Mac & Cheese) in disposable aluminum pans.
- Phase 3 (Cooked Portions): Finally, portion out the cooked items you prepared earlier. Let chili and soups cool completely before bagging them to prevent steam from creating ice crystals.
A key efficiency trick is using multiple appliances at once. Have your slow cooker simmering the pulled pork while the oven bakes a casserole you plan to eat this week, and use the stovetop for browning meat.
Week 4: The Art of Storing & Thawing
How you store your meals is just as important as how you make them. Poor storage leads to freezer burn and wasted effort.
- Label Everything (No Exceptions!): A perfect label contains three key pieces of information. Use a permanent marker.
- Dish Name: “Smothered Beef Burritos”
- Date Prepped: “10/26/23”
- Cooking Instructions: “Thaw in fridge. Bake covered at 375°F for 30 mins, then uncovered for 15.”
- Freeze Flat to Save Space: Squeeze every bit of air out of freezer bags containing liquids like soup, chili, or marinades. Lay them flat on a cookie sheet in the freezer. Once frozen solid, you can stack them vertically like books or files, saving an incredible amount of space.
- Prevent Freezer Burn: Air is the enemy. For casseroles, press a layer of plastic wrap directly onto the surface of the food before adding the foil lid. This extra barrier is your best defense against the dry, icy spots that ruin texture and flavor.
The Freezer Meal Playbook: Recipes and Tools
You don’t need a chef’s kitchen to succeed. A few key items and the right types of recipes make all the difference.
The Essential Toolkit for Success
- Gallon-Size Freezer Bags: Invest in a quality brand. A leaky bag of marinade is a disaster you don’t want to clean up.
- Baggy Holders: These simple plastic frames hold freezer bags open, giving you two free hands to dump ingredients in. They are an absolute game-changer for solo prepping.
- Permanent Markers: For clear, smudge-proof labels.
- Disposable Aluminum Pans (8×8 & 9×13): These allow you to bake meals directly from the freezer without tying up your nice glass bakeware for a month.
- Large Mixing Bowls: You’ll need at least one giant bowl for mixing things like meatballs or casserole fillings.
- A Reliable Slow Cooker: Perfect for “dump and go” meals that cook while you’re busy.
8 Fail-Proof Recipe Categories for Your Monthly Plan
To ensure variety, build your plan around these tried-and-true categories.
- “Dump & Go” Raw Meals: Raw protein and a marinade/sauce go into a bag. On cooking day, you just dump it into a slow cooker or skillet. (Example: Cilantro Lime Chicken)
- Hearty Casseroles: The classics. Fully assemble in a pan, but freeze unbaked. (Example: Chicken Cordon Bleu Bake)
- Versatile Cooked Proteins: Cooked, shredded, or portioned proteins that can be used in multiple ways later (tacos, sandwiches, salads). (Example: Easy Slow Cooker Pulled Pork)
- Stuffed & Rolled Meals: These take more time on prep day but feel like a gourmet meal on a busy weeknight. (Example: Lasagna Roll Ups, Stuffed Peppers)
- Cozy Soups & Chilis: Cook completely, cool thoroughly, and freeze. Pro-Tip: If the recipe includes pasta or rice, cook and store that separately to add when reheating. This prevents it from getting mushy. (Example: Wendy’s Chili Copycat)
- Individual Portions: Perfect for quick lunches or feeding picky kids. (Example: Mini Meatloaf Muffins, Homemade Chicken Strips)
- DIY “Convenience” Foods: Healthier, cheaper versions of store-bought frozen staples. (Example: Homemade Frozen Pizzas)
- Slow Cooker Kits: All raw, chopped ingredients for a slow cooker meal go into one bag. (Example: Crockpot Roast Beef French Dip)
Answering Your Top Freezer Meal Questions
Here are a few common questions that come up when planning freezer meals for a month.
Q: What foods don’t freeze well?
A: Some foods change texture dramatically. Avoid freezing cream-based sauces on their own (they can separate), raw potatoes (they become grainy), fully cooked pasta (it gets mushy), and delicate vegetables like lettuce or cucumber. However, many of these ingredients are fine when mixed into a larger dish like a casserole.
Q: How long do these meals actually last in the freezer?
A: While you’re planning for a month, the meals will last much longer. According to the USDA, cooked casseroles and meat dishes maintain their best quality for 2-4 months. Raw marinated meats can last even longer. The “month” is a planning cycle, not a strict expiration date. Your labels will help you rotate your stock.
Q: Do I have to thaw meals before cooking?
A: It depends. For best results, large casseroles, meatloaves, and thick cuts of meat should be thawed in the refrigerator for 24 hours to ensure even cooking. Soups, chilis, and many slow cooker “dump” meals can be cooked directly from frozen, though you will need to add 50% or more to the cooking time. Your future self will thank you for writing thawing instructions on the label!
Q: Is freezer burn dangerous to eat?
A: No, it is not a food safety issue. Freezer burn is simply dehydration that occurs when food is exposed to air in the freezer. It creates dry, tough, and flavorless spots. While safe to eat, it’s unpleasant. The best way to deal with it is to prevent it with proper wrapping and by pressing all the air out of your freezer bags.
Your First “Mini-Month” Action Plan
Jumping into a full 20-meal prep can feel like a lot. Instead, start with a “two-week sprint” to build your confidence.
- Choose 4 Recipes: This weekend, pick just four recipes from the categories above. A great starting mix is two casseroles (like Baked Spaghetti) and two slow cooker kits (like Sweet & Sour Hawaiian Beef).
- Double Them: Prepare a double batch of each. This leaves you with 8 meals.
- Block Out 3 Hours: Dedicate a single three-hour window on a Saturday or Sunday. Follow the “Mega Prep Day” workflow on a smaller scale.
- Reap the Rewards: For the next two weeks, enjoy eight stress-free dinners. Experience firsthand how it feels to have a ready-made answer to “What’s for dinner?”.
Once you feel that relief and see how simple it can be, you’ll have all the motivation you need to scale up to a full month. Your freezer will become your most valuable kitchen appliance, a well-stocked ally in the daily battle for time, money, and peace of mind.

- Master Vegan Freezer Meal Prep to Simplify Your Busy Schedule - June 18, 2026
- Vegan Freezer Cooking Simplifies Healthy Meals on Busy Nights - June 17, 2026
- Vegetarian Freezer Recipes for Effortless Meal Prep and Delicious Dinners - June 16, 2026