Between late-night study sessions, early morning classes, and a social life, the idea of cooking can feel like a cruel joke. That’s why mastering a simple college student meal prep system isn’t just a trendy life hack—it’s your secret weapon for eating well, saving money, and freeing up precious time. Forget the perfectly curated Instagram containers; real-world meal prep is about making smart, small choices that pay off big all week long.
This guide is your playbook for making delicious, healthy meals that fit a student’s budget and schedule, even if your “kitchen” is just a microwave and a mini-fridge.
At a Glance: Your Meal Prep Cheat Sheet
- Find Your Style: Learn the three main meal prep methods—Batch Cooking, Component Prepping, and Assembly Prepping—and pick the one that fits your life.
- Build a Dorm-Ready Kitchen: Discover the essential, low-cost tools that make meal prep possible, even in a tiny space.
- Master 5 Meal Blueprints: Get five foolproof, budget-friendly meal formulas you can customize endlessly, from overnight oats to slow-cooker shredded chicken.
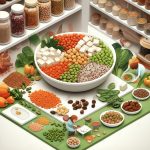
- Shop Smarter, Not Harder: Get a definitive grocery list of versatile, cheap staples that form the foundation of countless healthy meals.
- Solve Common Problems: Find quick answers to the biggest meal prep challenges, like sharing a small fridge or avoiding food boredom.
Ditch the All-or-Nothing Mindset: Find Your Prep Style
The biggest mistake students make is thinking meal prep means spending all of Sunday cooking five-course meals for the week. It doesn’t. The key is finding a system that works for you. All successful college student meal prep strategies fall into one of three simple approaches.
To dig deeper into building a sustainable routine, you can Get started with college meal prep with our complete foundational guide.
1. The Batch Cooker (Maximum Efficiency)
This is the classic approach. You make a large batch of one or two complete meals, like a big pot of chili, a hearty lentil soup, or a pan of baked feta pasta. You then portion it into containers for the next few days.
- Best for: Students with very limited time during the week.
- Pros: Incredibly time-efficient. You cook once and eat three or four times.
- Cons: Can lead to flavor fatigue if you don’t love the meal.
- Real-World Example: On Sunday, make a big batch of Vegan Sweet Potato Chili. Portion it into four containers. Now you have a grab-and-go lunch for Monday through Thursday.
2. The Component Prepper (Maximum Variety)
Instead of cooking full meals, you prepare individual ingredients. You might cook a batch of quinoa, roast a tray of vegetables, and bake some chicken breasts. During the week, you mix and match these components to create different meals.
- Best for: Students who get bored eating the same thing.
- Pros: Highly flexible and keeps meals interesting.
- Cons: Takes slightly more thought and assembly time each day.
- Real-World Example: On Sunday, you prep:
- A container of shredded chicken.
- A container of cooked brown rice.
- A container of roasted broccoli and bell peppers.
- Meal 1: A simple grain bowl with all three components.
- Meal 2: Shredded chicken tacos using tortillas and salsa.
- Meal 3: A quick chicken and veggie stir-fry.
3. The Assembly Prepper (The Hybrid)
This method focuses on doing all the prep work upfront so that cooking a fresh meal takes minutes. This means chopping all your vegetables, mixing marinades, or portioning out smoothie ingredients into bags.
- Best for: Students who want fresh-cooked meals without the daily hassle of chopping and measuring.
- Pros: You get a hot, fresh meal in 10-15 minutes.
- Cons: Still requires daily cooking, even if it’s quick.
- Real-World Example: Create freezer smoothie packs by portioning spinach, frozen banana, and protein powder into several reusable bags. In the morning, just dump one bag into the blender with milk and you’re done.
Your Kitchen Arsenal: The Essentials for Small Spaces
You don’t need a gourmet kitchen. With a few key items, you can create a surprisingly functional cooking setup in a dorm room or small apartment.
The Bare-Bones Basics (No Stove Required)
- Quality Food Containers: Invest in a set of microwave- and freezer-safe containers. Glass is durable and won’t stain, but high-quality BPA-free plastic is lighter and more portable.
- Small Cutting Board & Knife: A small paring knife is all you need for basic chopping.
- Can Opener: Essential for accessing cheap proteins like beans and tuna.
- Insulated Lunch Bag: A non-negotiable for carrying food across campus safely. Add a small ice pack to keep things chilled.
The Game-Changers (If Your Dorm Allows Them)
- Slow Cooker (Crockpot): This is the single best investment for college meal prep. You can throw ingredients in before class (like chicken breasts and a jar of salsa) and come home to a perfectly cooked meal. It’s the ultimate “set it and forget it” tool.
- Air Fryer: Perfect for making veggies crispy, cooking frozen turkey burgers in minutes, and reheating leftovers without turning them soggy like a microwave can. They’re also remarkably energy-efficient.
- Electric Kettle: Goes beyond tea and coffee. Use it for instant oatmeal, couscous, or upgrading a pack of ramen with fresh veggies.
- Rice Cooker: Makes perfect rice or quinoa every time while you focus on other things.
The College Meal Prep Playbook: 5 Foolproof Blueprints
Forget complicated recipes. These are flexible formulas you can adapt based on what’s on sale and what you have on hand.
Blueprint 1: The Overnight Oats Power-Up
This no-cook breakfast is a lifesaver. Make 3-5 jars on Sunday night for an effortless start to each day.
- The Formula: 1/2 cup Rolled Oats + 1/2 cup Milk (dairy or non-dairy) + 1 tbsp Chia Seeds + 1 tbsp Sweetener (maple syrup, honey)
- Cost-Effective Mix-Ins:
- Protein: A scoop of protein powder, Greek yogurt, or peanut butter powder.
- Fruit: Frozen berries are cheaper and just as nutritious as fresh.
- Flavor: A dash of cinnamon, cocoa powder, or instant coffee.
- Cost per serving: ~$1.00 – $1.50
Blueprint 2: The “Everything” Burrito Bowl
This is the ultimate component-prep meal. It’s cheap, filling, and easy to customize.
- The Formula: 1 part Grain Base + 1 part Protein + Veggies & Toppings
- Base: Batch-cooked rice, quinoa, or even just a bed of lettuce.
- Protein: Canned black beans (rinsed!), ground turkey/beef browned with taco seasoning, or slow-cooker shredded chicken.
- Veggies & Toppings: Canned corn, salsa (doubles as a dressing), chopped cherry tomatoes, or a sprinkle of cheese.
- Cost per serving: ~$2.00 – $3.00
Blueprint 3: The 30-Minute Wonder Soup
A big pot of lentil or bean soup is one of the cheapest and most nutritious meals you can make. It also freezes beautifully.
- The Formula: 1 part Legume + 1 part Canned Tomatoes + 1 part Broth + Aromatics
- Legume: Red lentils (they cook in ~20 mins), canned chickpeas, or cannellini beans.
- Aromatics: A chopped onion and a clove of garlic. (Buy a bag of onions and a head of garlic; they last for weeks).
- Spices: Chili powder for a chili, cumin and coriander for a dal, or Italian seasoning for a minestrone-style soup.
- Cost per serving: ~$1.35 – $1.75
Blueprint 4: The Protein Power Pack
Sometimes you just need a substantial snack or a light lunch. Think of these as a healthier, cheaper “adult lunchable.”
- The Formula: 1 High-Protein Source + 1 Fruit or Veggie + 1 Healthy Fat
- Combinations:
- 2 Hard-boiled eggs + baby carrots + a handful of almonds.
- A small tub of hummus + bell pepper strips + whole-wheat crackers.
- Greek yogurt cup + an apple + a sprinkle of trail mix.
- Cost per pack: ~$2.00 – $3.50
Blueprint 5: The Slow-Cooker Shredded Meat Method
This is the definition of low-effort, high-reward cooking. One batch of shredded meat can be used in a dozen different ways.
- The Formula: 2 lbs Boneless, Skinless Chicken Breast or Pork Shoulder + 1 cup of Liquid/Sauce
- Method: Place meat in the slow cooker. Pour liquid over top. Cook on low for 6-8 hours or high for 3-4 hours. Shred with two forks directly in the pot.
- Flavor Ideas: A jar of your favorite salsa, BBQ sauce, or teriyaki sauce.
- Uses: Tacos, burrito bowls, sandwiches, salads, or served over rice.
- Cost per serving: Varies by meat price, but extremely cost-effective.
Quick Answers: Your College Meal Prep Questions, Answered
Q: I share a tiny dorm fridge with a roommate. How can I possibly meal prep?
A: Focus on prepping for just 2-3 days at a time, not a full week. Prioritize recipes with shelf-stable ingredients (like a bean salad or peanut butter energy balls) and use your precious fridge space for just the essentials, like your three containers of overnight oats or portioned chicken. Use stackable, square containers to maximize vertical space.
Q: Isn’t it super boring to eat the same thing every day?
A: It is! That’s why the “Component Prep” style is so effective. By prepping ingredients instead of full meals, you can change the flavor profile daily. The same shredded chicken can be used for a BBQ sandwich on Monday, a spicy chicken quesadilla on Tuesday, and a Greek-inspired chicken and quinoa bowl on Wednesday. A simple change of sauce or spice makes all the difference.
Q: I have no kitchen, just a microwave and a mini-fridge. Am I out of luck?
A: Not at all. Your microwave is more powerful than you think. You can “bake” potatoes, steam vegetables in microwave-safe bags, and make scrambled eggs in a mug. Combine these with no-cook items. For example, have a microwaved sweet potato topped with canned black beans and salsa. Make Mediterranean chickpea salad (canned chickpeas, chopped tomato, cucumber, olive oil, lemon juice) that requires no heat at all.
Q: How do I keep food safe if I’m carrying it around campus all day?
A: An insulated lunch bag with a reusable ice pack is non-negotiable. According to the USDA, perishable food should not be left in the “danger zone” (40°F – 140°F) for more than two hours. For hot foods like soup or chili, a high-quality thermos (like one from Stanley or Thermos) can keep your meal safely hot for 5-7 hours. Pre-heat the thermos by filling it with boiling water for a few minutes before adding your hot food.
Your First 1-Hour Meal Prep: A Sunday Game Plan
Feeling overwhelmed? Don’t be. You can change your entire week in under an hour. Here’s your mission for this Sunday.
- Plan (10 minutes): Choose ONE breakfast and ONE lunch to prep from the blueprints above. The Overnight Oats and Burrito Bowls are perfect starting points. Write down the 5-8 ingredients you need.
- Shop (30 minutes): Go to the store with your list. Stick to it. Avoid impulse buys.
- Prep (20 minutes): Put on your favorite podcast or playlist. Make your three jars of overnight oats and put them in the fridge. Assemble your three burrito bowls. That’s it.
You just reclaimed hours of your upcoming week, saved at least $15-$20 on takeout, and guaranteed you’ll have a healthy, delicious meal ready when you’re hungry. That’s the real power of a smart college student meal prep habit. You’ve got this.

- Master Vegan Freezer Meal Prep to Simplify Your Busy Schedule - June 18, 2026
- Vegan Freezer Cooking Simplifies Healthy Meals on Busy Nights - June 17, 2026
- Vegetarian Freezer Recipes for Effortless Meal Prep and Delicious Dinners - June 16, 2026