Want to make your own delicious elderberry liqueur? It’s easier than you think! This guide walks you through the whole process, from picking the right berries to bottling your finished masterpiece. We’ll explore different recipes, compare ingredients, and show you how to avoid common mistakes. Whether you’re a beginner or a seasoned homebrewer, you’ll learn everything you need to know to create a truly special elderberry liqueur that reflects your unique tastes. Get ready to embark on a fun and rewarding journey from berry to bottle! For another delicious elderberry treat, check out this elderberry jelly recipe.
Understanding Elderberry Liqueur
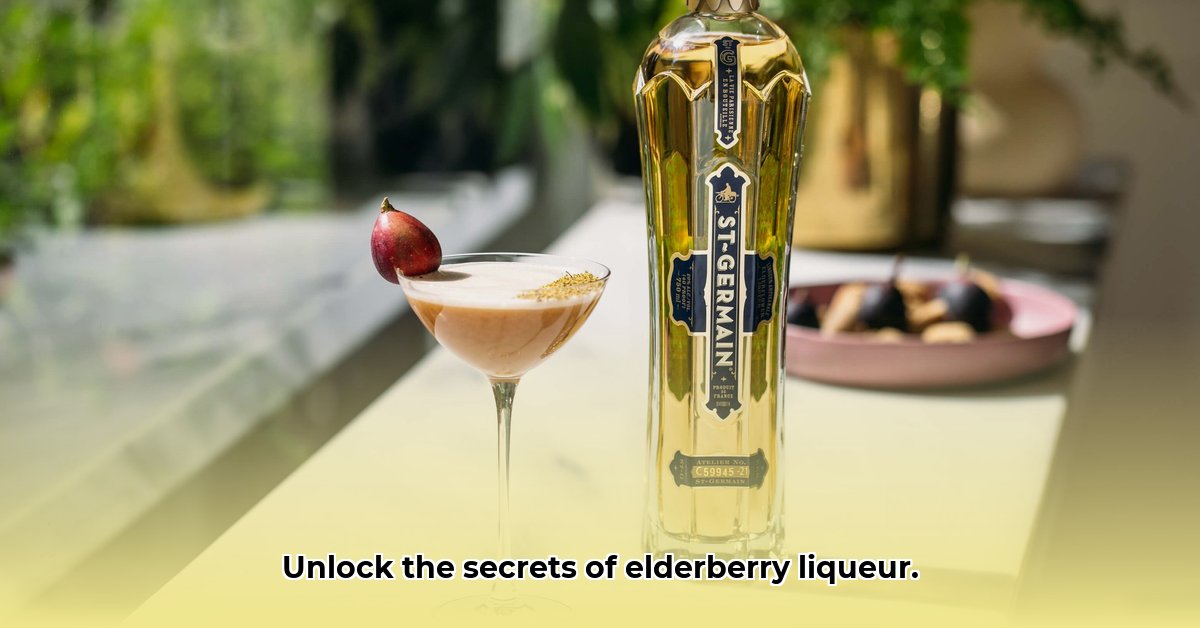
Elderberry liqueur, a delightful concoction steeped in history, offers a unique blend of sweet and tart flavors. This homemade elixir not only tantalizes the palate but also boasts potential health benefits, thanks to the elderberry’s rich antioxidant content. Creating your own elderberry liqueur allows for complete control over ingredients and flavor profiles, resulting in a personalized beverage perfect for sipping, mixing in cocktails, or drizzling over desserts.
Elderberry Liqueur: A Step-by-Step Guide
Making your own elderberry liqueur is a fun project that combines a bit of science with a whole lot of delicious creativity. There are tons of different recipes out there, each leading to a unique final product, so let’s dive in and explore the process! Changing even one ingredient, like using honey instead of sugar, can dramatically alter the liqueur’s final flavor profile.
Ingredient Selection and Preparation: Getting Started Right
The journey begins with selecting high-quality ingredients, which significantly impact the final flavor.
Berries: Fresh elderberries generally provide a more vibrant and intense flavor, and they infuse more quickly. However, dried berries are readily available year-round, providing convenience and sometimes adding an interesting “raisiny” note to the finished product. Just remember that they’ll need a longer infusion time.
Safety First: Crucially, you must correctly identify the berries. Mistaking another species for elderberries can be dangerous, as some berries are highly toxic. Consult with local foraging guides and cross-reference images to ensure accurate identification. When in doubt, err on the side of caution and avoid consumption. Purchase elderberries from reputable sources to guarantee their safety.
Stems: Before anything else, remove as many stems as possible. Elderberry stems contain compounds that can cause nausea if ingested in significant quantities. While a few small stems are unlikely to cause harm, it’s best to remove them diligently.
Alcohol: The type of alcohol you choose also greatly affects the end result. Popular choices include:
- Vodka: Provides a neutral base, showcasing the pure elderberry flavor.
- Gin: Adds botanical notes, creating a more complex and aromatic liqueur.
- Brandy: Offers a richer, more complex flavor profile, lending warmth and depth.
Experiment with different alcohols and strengths to find what you enjoy best. Higher-proof alcohols extract flavors more effectively but can also result in a harsher final product.
Sweetener: The type of sweetener will also have an impact.
- Granulated Sugar: Offers a clean, neutral flavor.
- Honey: Adds a floral and complex flavor.
- Agave Nectar: Provides a subtle sweetness with a thinner consistency than honey.
Other Flavorings: While optional, lemon or orange peel can add depth to the liqueur.
Fresh vs. Dried Elderberries: Weighing the Pros and Cons
| Feature | Fresh Elderberries | Dried Elderberries |
|---|---|---|
| Flavor | Intense, bright, and fruity | Slightly less intense, sometimes with a “raisiny” note |
| Infusion Time | Faster, typically a few weeks to a couple of months | Longer, potentially several months |
| Availability | Seasonal, often only available for a short period | Widely available year-round |
| Convenience | Needs immediate processing | Easy to store and use at your convenience |
| Cost | Usually more expensive | Usually more affordable |
The Infusion Process: Macerating Your Berries
Maceration — letting the berries soak in the alcohol — is where the magic happens. Follow these guidelines for optimal results:
- Container: Use a clean glass jar with a tight-fitting lid.
- Ratio: A general guideline is to use approximately 1 cup of berries per 750ml of alcohol, but you can adjust this based on your preference.
- Technique: Gently stir the mixture daily to ensure that the alcohol extracts all the delicious flavors from the berries evenly.
- Temperature: Keep the mixture at a cool, consistent temperature—around 60-70°F (15-21°C) is ideal. Avoid direct sunlight, which can degrade the flavor and color of the liqueur.
- Duration: How long you macerate depends on the ingredients and the intensity you’re going for. It can range from a few weeks to a whole year! Taste-test periodically to monitor the flavor development.
Sweetening and Flavoring: Adding Your Personal Touch
Once the maceration is complete, it’s time to personalize your liqueur.
- Sweeteners: Are a matter of personal preference. Granulated sugar provides a clean, straightforward sweetness, while honey adds a complex, floral touch. Adjust the amount depending on how sweet your berries are and how sweet you like your liqueur to be. Start with a small amount and add more to taste.
- Spices and Flavors: Experiment with spices and other flavorings! Cinnamon, cloves, and cardamom can add incredible depth and warmth. A little lemon zest can brighten the whole thing up. Vanilla beans also pair well.
- Timing: Add sweeteners and spices after straining the berries. This allows you to better control the final flavor profile.
“Finding the perfect balance of sweetness is key to highlighting the elderberry’s unique flavor profile,” according to expert mixologists.
Straining and Bottling: The Final Steps
Once your liqueur has reached its desired flavor profile, carefully strain it to remove the berry solids. A cheesecloth or a fine-mesh sieve works best to get a nice, clear liquid. For an extra-clear liqueur, consider straining twice. Then, bottle your carefully crafted elderberry liqueur into clean, airtight containers. Make sure to label each bottle clearly, including the date you made it, the alcohol content (if known), and a list of ingredients. Store it in a cool, dark place to keep it fresh. Elderberry liqueur can typically be stored for up to a year.
Recipe Variations: A Few Delicious Starting Points
This table shows a few different recipes to give you some ideas, but remember, these are just jumping-off points! Feel free to adjust them to your tastes.
| Recipe Name | Berry Type | Alcohol | Spices/Flavorings | Sweetener | Approximate Infusion Time (months) | Notes |
|---|---|---|---|---|---|---|
| Classic Elderberry | Fresh | Vodka | None | Sugar | 1-2 | Simple, clean, and lets the elderberry shine. |
| Spiced Elderberry | Dried | Brandy | Cinnamon, star anise, cloves | Honey | 3-6 | Warm, rich, and perfect for colder months. |
| Citrus Elderberry | Fresh | Gin | Orange zest, lemon zest | Sugar Syrup | 1 | Bright, zesty, and refreshing. |
| Herbal Elderberry | Fresh | Vodka | Mint, rosemary | Honey | 2 | Unique, invigorating, and herbaceous. |
Troubleshooting and Tips: What to Expect (and How to Fix It)
While making elderberry liqueur is generally straightforward, some things can go wrong.
- Incorrect Berry Identification: As mentioned before, this is the most serious issue—they could be toxic, and safety comes first.
- Contamination: Make sure you use clean equipment and sterile practices. Sanitize all jars, utensils, and bottles before use.
- Spoilage: Proper storage is key. Always store your liqueur in a cool, dark place and use it within a reasonable timeframe (up to a year). If you notice any cloudiness, off-odors, or unusual flavors, discard the liqueur.
- Lack of Flavor: If your liqueur lacks flavor, try infusing it for a longer period. You can also add more berries or other flavorings.
- Too Sweet: If your liqueur is too sweet, add a splash of lemon juice or more alcohol to balance the flavor.
- Too Bitter: Bitterness can come from the stems or from over-extraction. Make sure to remove stems thoroughly and avoid infusing for too long.
Remember: Making elderberry liqueur is a journey of discovery! Don’t be afraid to experiment, try new things, and most of all, have fun! The process is just as rewarding as the delicious results.
How to Make Elderberry Liqueur with Dried Berries for Maximum Flavor
Dried elderberries offer a potent flavor and convenient year-round access. This section focuses specifically on maximizing their potential in your homemade liqueur.
Key Takeaways:
- Dried elderberries offer convenience and often a more concentrated flavor than fresh.
- Alcohol choice significantly impacts the final taste.
*

- Easy Cold Meal Prep Ideas for No-Microwave Lunches on the Go - March 11, 2026
- Delicious Meal Prep Cold Meals Ready to Grab and Go - March 10, 2026
- Cold Meal Prep Makes Healthy, Stress-Free Lunches Easy - March 9, 2026