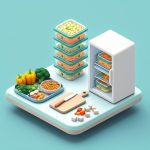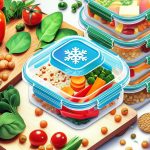
That moment of lunchtime disappointment is all too familiar: the crisp salad greens you packed are now wilted from the dressing, and your crunchy croutons are a soggy mess. Or perhaps the curry has bled into the rice, creating a uniform, unappealing mush. This is where high-quality meal containers with dividers transform your daily food routine, turning a potential mess into a perfectly portioned, fresh-tasting meal. They are the simple, elegant solution to keeping foods separate, textures distinct, and flavors pure until you’re ready to eat.
At a Glance: Your Guide to Divided Containers
This guide will give you the practical knowledge to choose and use the best divided containers for your needs. Here’s what you’ll walk away with:
- A clear framework for picking the right material—glass, plastic, or steel—for your lifestyle.
- The ability to match the number of compartments (two, three, or more) to the meals you actually prepare.
- An understanding of how different lid designs directly impact leak-proofing and freshness.
- A step-by-step packing method to maximize space and prevent different food textures from mixing.
- Quick answers to common questions about safety, cleaning, and durability.
Choosing Your Material: Glass, Plastic, or Stainless Steel?
The foundation of a great divided container is its material. Each type offers a distinct set of trade-offs in terms of weight, durability, and how you can use it. Your daily routine—whether you’re commuting, working from home, or packing for kids—will point you to the right choice.
The Glass Advantage: Clarity, Durability, and Oven-Safe
Borosilicate glass containers are the gold standard for many meal preppers. They don’t absorb stains or odors, meaning last Tuesday’s marinara sauce won’t haunt Friday’s chicken and rice. You can see exactly what’s inside, which helps you quickly grab what you need from the fridge.
Their biggest benefit is thermal resilience. Most glass containers (always check the manufacturer’s label) can go from the refrigerator to the microwave or even a preheated oven (base only). This makes them incredibly versatile for reheating leftovers, ensuring your food is heated evenly without needing to transfer it to another dish.
- Best for: Reheating full meals at home or the office, storing acidic or strongly flavored foods, and anyone who prefers a non-plastic food surface.
- Keep in mind: Glass is heavier and more susceptible to breaking if dropped.
The Plastic Powerhouse: Lightweight, Portable, and Budget-Friendly
For those who are always on the go, plastic is often the most practical choice. Modern, high-quality plastic meal containers are a world away from flimsy takeout boxes. Look for options labeled “BPA-free” to ensure food safety.
Their chief advantage is their light weight, which makes a huge difference when you’re carrying a lunch bag, gym bag, and laptop. They are also highly durable and won’t shatter if accidentally knocked off a counter. Plastic containers are typically more affordable, allowing you to build a large collection for a full week of meal prep without a major investment.
- Best for: Commuters, students, kids’ lunches, and cold meals like salads or sandwiches.
- Keep in mind: Plastic can stain from foods like tomato sauce or turmeric and may retain strong odors over time.
The Stainless Steel Contender: The Unbreakable Modern Choice
Stainless steel offers a unique combination of benefits. It’s nearly indestructible, making it perfect for rugged environments like construction sites or camping trips. Like glass, it won’t absorb stains or odors, and it’s completely inert, meaning it won’t react with your food.
While you can’t see the contents, many modern steel containers have a sleek, minimalist aesthetic. Their primary limitation is the microwave—you can’t put metal in one. This makes them ideal for cold or room-temperature meals, or if you have access to a stovetop or oven for reheating.
- Best for: Salads, sandwiches, snacks, kids’ bento boxes, and anyone needing extreme durability.
- Keep in mind: They are not microwave-safe and often come at a premium price point.
| Feature | Glass Containers | Plastic Containers | Stainless Steel Containers |
| :— | :— | :— | :— |
| Weight | Heavy | Lightweight | Light to Medium |
| Durability | Breakable | Highly Durable | Nearly Indestructible |
| Microwave-Safe | Yes (Base Only) | Yes (Check Label) | No |
| Oven-Safe | Yes (Base Only) | No | Yes (Check Label) |
| Stain/Odor Resistance | Excellent | Fair to Good | Excellent |
| Cost | Medium to High | Low to Medium | Medium to High |
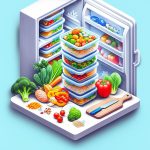
Decoding the Compartments: From Bento Boxes to Meal Prep Trays

The number of dividers in a container should directly reflect the kind of meals you eat. Using a container with too many compartments can lead to wasted space, while too few can result in the dreaded food mixing.
The Two-Compartment Classic: The Entrée & Side Workhorse
This is the most straightforward design, perfect for separating a main course from a single side. It excels at keeping a “wet” component away from a “dry” one until you’re ready to combine them.
- Real-World Example: Pack grilled salmon in the large section and roasted asparagus in the smaller one. Or, keep a hearty chili in one side and a cornbread muffin or rice in the other, preserving the texture of each.
The Three-Compartment Trio: The Balanced Meal Blueprint
This is arguably the most popular configuration for structured meal prepping. It naturally aligns with the balanced plate model: a protein, a carbohydrate, and a vegetable. This layout encourages portion control and makes it easy to build a nutritionally complete meal.
Thinking about how to separate elements for a single meal is a great skill that scales up. For those planning bigger events, this same logic applies to party platters and serving stations. Mastering your personal containers is excellent practice for when you need to think about Easy entertaining with Tupperware dividers, which helps streamline hosting for larger groups.
- Real-World Example: Fill the largest compartment with shredded chicken, the medium one with quinoa, and the smallest with steamed broccoli and bell peppers.
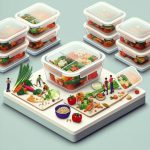
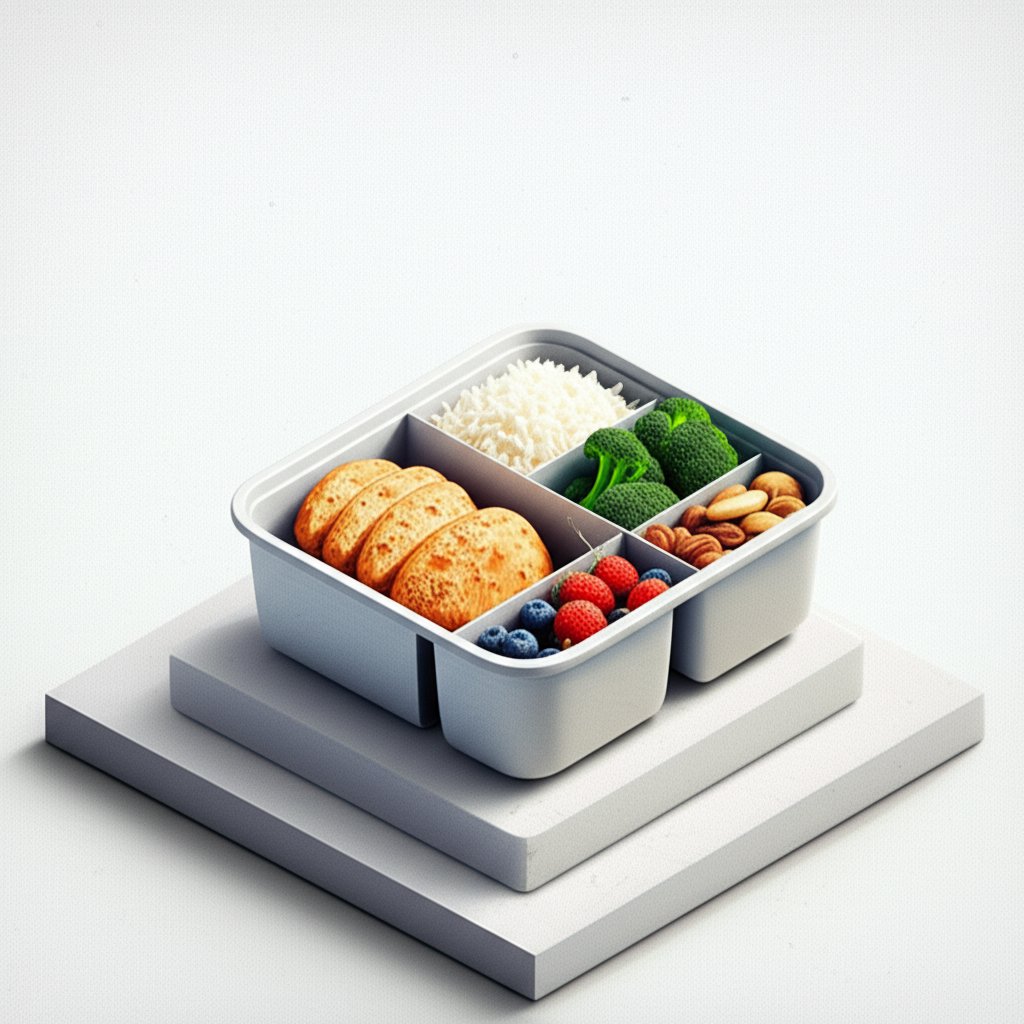
The Four+ Compartment Specialist: The Snacker’s and Kid’s Delight
Often called bento boxes, these containers are designed for variety and small portions. They are fantastic for creating a “snack plate” lunch, which can be more appealing than a single large entrée, especially for kids.
- Real-World Example: Pack a small wrap in one section, cherry tomatoes and cucumber slices in another, a handful of almonds in a third, and some grapes or berries in the fourth. Everything stays separate, fresh, and visually appealing.
Not All Lids Are Created Equal: The Secret to a True Seal
A container is only as good as its lid. A poor seal can lead to leaks in your bag and let air in, spoiling your food faster. The two most common designs are snap-lock and press-fit, each with its own strengths.
Snap-Lock Lids: The Leak-Proof Gold Standard
These lids feature hinged latches on two or four sides that “snap” shut, compressing a silicone gasket against the rim of the container. This creates an airtight and watertight seal that you can trust. If you plan to transport soups, stews, yogurts, or anything with a sauce, a snap-lock lid is non-negotiable.
Pro Tip: Look for lids with a built-in steam vent. This small, openable valve allows you to microwave your food with the lid on (but unlatched), preventing messy splatters while allowing steam to escape safely.
Press-Fit Lids: The Simple, Stackable Solution
These are the more traditional lids that you simply press onto the container. While they are great for storing solid foods in the refrigerator or dry goods in the pantry, they are far less reliable for liquids or during transport. Their main advantage is often a lower profile, which makes them easier to stack. Use these for leftovers you know will stay upright in the fridge, not for the lunch you toss in your work bag.
Your Step-by-Step Packing Guide for Perfect Meals
How you pack your container is just as important as which container you choose. A few simple techniques can elevate your meal-prep game.
- Start Cool. Always let hot foods, like roasted vegetables or grilled chicken, cool to at least room temperature before sealing the lid. Trapping steam creates condensation, which can make crispy foods soggy and create a breeding ground for bacteria.
- Place Wet Items Strategically. Put sauces, dressings, and wetter ingredients (like stews or curries) in their own dedicated compartment. If the dividers aren’t fully leak-proof, this is even more critical.
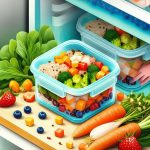
- Protect the Crisp. The cardinal rule of divided containers is to isolate anything you want to stay crunchy. Crackers, nuts, seeds, croutons, and breaded items should always get their own dry compartment.
- Layer Smartly Within Compartments. For salads, build them upside down. Put the dressing on the very bottom of a compartment, followed by hard veggies (carrots, cucumbers), then grains or proteins, and finally, the delicate leafy greens on top.
- Don’t Overfill. Leave a little bit of headspace at the top. This helps prevent the contents from being squished and makes it easier to stir or mix after reheating without spilling.
Frequently Asked Questions About Divided Containers
Even seasoned pros have questions. Here are clear answers to some of the most common ones.
Are the dividers in meal containers with dividers usually leak-proof between compartments?
This is a critical detail. In many budget-friendly plastic containers, the dividers don’t go all the way up to the lid or don’t form a perfect seal with it. This means thin liquids like a vinaigrette can seep from one section to another if the container is tilted. Higher-end models, particularly some glass and stainless steel options, often feature lids with integrated silicone seals that press down on each divider wall, creating truly isolated, leak-proof compartments. Always check the product description for terms like “leak-proof compartments” if this is important to you.
Can I put glass meal containers directly from the fridge into a hot oven?
It’s best not to. Glass is vulnerable to “thermal shock”—a rapid, extreme change in temperature that can cause it to crack or shatter. To be safe, either let the glass container sit on the counter for 20–30 minutes to warm up slightly, or place the cold container in a cold oven and let them preheat together.
How do I get stubborn curry or tomato stains out of my plastic containers?
This is the classic struggle with plastic. The best defense is to lightly coat the inside of the container with cooking spray before adding stain-prone foods. To treat an existing stain, make a paste of baking soda and water, spread it over the stained area, and let it sit for several hours before washing. Another effective, if unconventional, method is to place the empty, clean container in direct sunlight for a day. The UV rays can naturally bleach the stain away.
Are all “microwave-safe” plastic containers truly safe?
The “microwave-safe” label primarily means the plastic won’t melt, warp, or catch fire at microwave temperatures. However, for health and safety, it’s crucial to also ensure the container is labeled “BPA-free.” The non-profit Environmental Working Group notes that even BPA-free plastics can sometimes leach chemicals when heated, especially with fatty or oily foods. If this is a concern, glass is always the safest bet for reheating.
Your Quick-Start Guide to Choosing the Right Container
Stop the analysis paralysis. Use this simple decision framework to pick the perfect meal containers with dividers for your needs today.
- If you commute daily and need lightweight portability, start with a set of high-quality, BPA-free plastic containers. A three-compartment design with snap-lock lids is the most versatile for carrying salads, grain bowls, and other on-the-go lunches.
- If you primarily work from home and prioritize easy reheating and long-term durability, invest in a set of borosilicate glass containers. The ability to go from fridge to microwave to oven (and dishwasher) makes them the ultimate kitchen workhorse.
- If you are packing for active kids, need something for rugged work environments, or simply love a bento-style snack lunch, a stainless steel container is an excellent choice. Its durability is unmatched, and it’s perfect for keeping food cool and fresh.
By matching the right container to your routine, you’re doing more than just organizing your fridge. You are setting yourself up for healthier habits, reducing food waste, and guaranteeing a delicious, fresh-tasting meal every single time.

- Master Vegan Freezer Meal Prep to Simplify Your Busy Schedule - June 18, 2026
- Vegan Freezer Cooking Simplifies Healthy Meals on Busy Nights - June 17, 2026
- Vegetarian Freezer Recipes for Effortless Meal Prep and Delicious Dinners - June 16, 2026