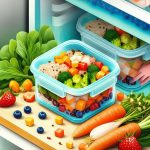
The Sunday night ritual is a familiar one: a kitchen humming with activity, delicious smells filling the air, and a counter lined with a week’s worth of lunches and dinners. But the satisfaction can quickly fade when you reach for your storage containers. One is permanently stained from last week’s curry, another has a lid that warped in the dishwasher, and you’re hesitant to put that last one in the microwave. This is where upgrading to borosilicate glass meal prep containers transforms the entire process from a chore into a seamless system.
Unlike the standard soda-lime glass used for drinking glasses, borosilicate glass is engineered for thermal resilience, making it the undisputed champion for anyone who takes meal prep seriously. It’s the key to a true cook-once, eat-all-week strategy that’s safer, cleaner, and far more versatile.
At a Glance: Your Takeaways
- Understand Thermal Shock Resistance: Learn why borosilicate glass can go from a hot oven to the fridge without cracking, a feature standard glass lacks.
- Master the Cook-Store-Reheat Workflow: Discover how using a single container for baking, storing, and microwaving saves time and reduces cleanup.
- Choose the Right Lids and Sizes: Identify the features of a high-quality lid—airtight seals, secure locks, and BPA-free materials—and select the right container shapes for your meals.
- Adopt Best Practices for Longevity: Get practical tips for caring for your glass and lids to ensure they last for years.
- Debunk Common Myths: Find clear answers to questions about freezer safety, brand differences (like Pyrex), and proper handling.
The Weak Link in Your Meal Prep: Why Standard Containers Fail
For years, the choice for food storage was a simple one: plastic or glass. Plastic is lightweight but prone to staining, warping, and absorbing odors. It also raises valid concerns about chemicals like BPA leaching into food, especially when heated.
Standard glass containers solved the staining and odor issues but introduced a new, more dangerous problem: thermal shock. Regular soda-lime glass expands and contracts rapidly with temperature changes. Moving it too quickly from a hot oven to a cool countertop, or from the refrigerator to a hot microwave, can cause it to shatter. This limitation forces you to use more dishes—one for baking, another for storing, and perhaps another for reheating.
This is the precise challenge that borosilicate glass meal prep containers were built to overcome. By adding boron trioxide to the silica and soda ash formula, manufacturers create a glass with a very low coefficient of thermal expansion. In simple terms, it doesn’t expand or contract dramatically when its temperature changes. This chemical stability is what allows you to take a container of roasted vegetables from a 450°F oven, let it cool briefly, and place it directly in the refrigerator without worrying about catastrophic failure. For a deeper dive into the science and safety of this material, our comprehensive Borosilicate glass storage guide covers all the bases.
From Oven to Freezer Without Fear: The Borosilicate Advantage in Action
The true magic of borosilicate glass isn’t just its durability; it’s the workflow it unlocks. It allows you to collapse multiple steps—cooking, storing, and reheating—into one vessel.
A Real-World Meal Prep Scenario
Imagine you’re prepping lemon-herb chicken with roasted broccoli for three days.
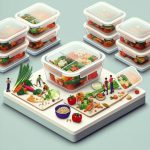
- Old Method (Standard Glass/Plastic): You’d roast the chicken and broccoli on a large baking sheet. After it cools, you’d portion it out into three separate plastic or standard glass containers. To reheat, you might transfer it to a microwave-safe plate to ensure even heating and avoid damaging the container. By the end, you have a baking sheet, three containers, and three plates to wash.
- Borosilicate Method: You portion the raw chicken and broccoli into three individual borosilicate glass containers. You bake them directly in those containers (without the lids). Once cooked, the containers cool on the counter for a few minutes before the lids go on and they’re stacked in the fridge. To reheat, you simply vent the lid and place the entire container in the microwave. You’ve just eliminated the baking sheet and the extra plates from your cleanup.
This streamlined process is the core benefit. You handle the food less, create fewer dirty dishes, and move seamlessly from one step to the next.
A Practical Guide to Choosing Your Container Set
Not all borosilicate containers are created equal. The glass might be the star, but the supporting features—lids, shape, and compartments—determine how well the set works for you.
Lids Matter (Almost) as Much as the Glass
A great container with a poor lid is a recipe for spills and spoiled food. Look for lids with these three features:
- Secure Locking Mechanism: Four-sided, snap-locking tabs are the gold standard. They provide a confident, audible “click” and create even pressure across the seal.
- Airtight Silicone Gasket: The lid should have a removable silicone ring that presses firmly against the glass rim, preventing leaks and locking out air. This is crucial for keeping salads crisp and preventing soup from sloshing in your lunch bag.
- BPA-Free, Vented Plastic: The lid itself should be made from sturdy, BPA-free polypropylene. A small vent that can be opened for microwaving is a huge plus, as it allows steam to escape and prevents pressure buildup without you having to remove the lid entirely.
Size and Shape for Smart Stacking and Portioning
Efficiency in meal prep extends to your fridge and cabinet space.
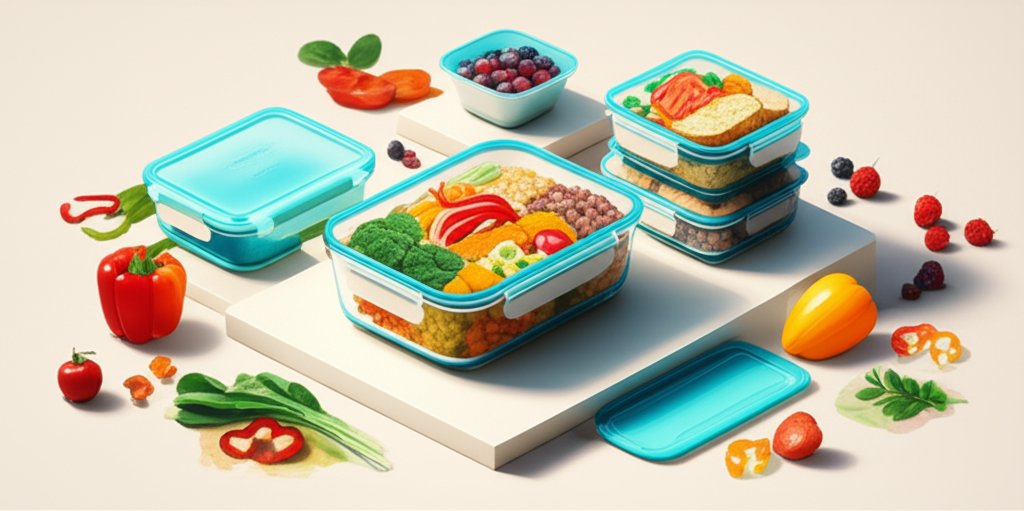
- Rectangular vs. Round: Rectangular containers are the clear winner for spatial efficiency. They stack neatly in the fridge and freezer like bricks, minimizing wasted space. Round containers are excellent for soups, stews, and salads but are less efficient to store.
- A Mix of Sizes: A good starter set includes various sizes. A single collection might include small containers for snacks or sauces, medium ones for lunches, and larger ones for family-style leftovers or batch-cooking components.
Here’s a quick guide to matching size with purpose:
| Container Size (Approx.) | Best For | Real-World Example |
| ———————— | ——————————————— | ——————————————- |
| 12-15 oz (350-450 mL) | Snacks, sauces, small sides | A portion of Greek yogurt with berries. |
| 21-28 oz (620-830 mL) | Individual lunch/dinner portions | A chicken breast with a side of quinoa. |
| 35-50 oz (1000-1500 mL) | Large individual meals or small family mains | A generous serving of lasagna or chili. |
| 50+ oz (1500+ mL) | Batch components, family-style leftovers | Storing a large batch of pulled pork. |
Single vs. Multi-Compartment Containers
The final decision is how to divide your food.
- Single-Compartment: These are the most versatile. They’re perfect for “one-pot” style meals like stews, pasta dishes, grain bowls, and large salads where you want the ingredients to mix.
- Multi-Compartment (Bento-Style): These containers feature built-in glass dividers. They are ideal for meals where you need to keep components separate to maintain texture and flavor—think grilled chicken, a side of rice, and steamed vegetables, or a main dish with a sauce you don’t want soaking in until lunchtime.
The Meal Prepper’s Playbook: Best Practices for Borosilicate Glass
To get the most out of your investment, follow a few simple rules for use and care.
- Always Cook Without the Lid: The plastic lids are not oven-safe. They will melt and warp at high temperatures. Always remove them before placing the glass base in the oven.
- Respect the “Cool Down” Rule: While borosilicate glass is highly resistant to thermal shock, it isn’t indestructible. Avoid extreme temperature swings. A good practice is to let a hot container rest on the stovetop or a cooling rack for 10-15 minutes before transferring it to the fridge or freezer. This also protects other food in your fridge from being warmed up.
- Care for Your Lids and Gaskets: Wash lids on the top rack of the dishwasher or by hand. To prevent mold or lingering odors in the silicone gasket, pop it out of the lid channel occasionally and wash it separately. A quick soak in a vinegar-water solution can remove stubborn smells like onion or garlic.
- Microwave with the Vent Open: If your lid has a steam vent, open it before microwaving. If it doesn’t, rest the lid loosely on top of the container instead of snapping it shut. This prevents a vacuum from forming and allows steam to escape safely.
- Check for Chips and Cracks: Before each use, give the container a quick visual inspection, especially around the rim. A small chip can compromise the structural integrity of the glass, making it more susceptible to breaking under stress.
Quick Answers to Common Questions
Getting started with a new type of kitchenware always brings up questions. Here are the most common ones, answered directly.
Can I put a hot borosilicate container directly into the freezer?
While the glass can likely handle it, it’s not recommended. The sudden heat transfer can overwork your freezer’s compressor and lower the temperature of surrounding frozen foods, potentially causing them to partially thaw and refreeze. The “cool down” rule is the best practice for both your containers and your appliances.
Are the plastic lids really safe to put in the microwave?
Most high-quality lids are made from BPA-free polypropylene and are labeled “microwave safe.” However, this generally means they won’t melt or warp. To be extra cautious and prevent any potential for chemical leaching, many experts recommend not letting the lid come into direct contact with your food during heating. Venting it or placing it loosely on top is the safest approach.
How do borosilicate glass meal prep containers compare to brands like Pyrex?
This is an important distinction. The brand name Pyrex (spelled in all-caps, PYREX) sold in Europe is typically made from borosilicate glass. However, the pyrex brand (in lowercase) sold in the United States since the 1990s is generally made from tempered soda-lime glass. While stronger than regular glass, it does not have the same high thermal shock resistance as borosilicate. If oven-to-fridge versatility is your priority, you must ensure the product is explicitly described as “borosilicate glass.”
These containers are heavier than plastic. Is it worth the trade-off?
Yes, for most people. The extra weight is a direct result of the durable, non-porous material. The trade-off is a container that won’t stain, warp, or absorb odors, and offers far greater cooking and reheating flexibility. The peace of mind from a health and durability standpoint is well worth the added heft in your lunch bag.
Making the Switch: Your First Steps
Adopting borosilicate glass meal prep containers is one of the highest-impact upgrades you can make to your kitchen routine. You get a safer, more durable, and incredibly efficient system that supports your health goals and saves you time.
Ready to make the change? Here’s how to start:
- Assess Your Needs: Think about what you cook most. Do you need bento-style dividers for separate components, or are single-compartment containers more your style? How many meals do you prep at once?
- Start with a Core Set: You don’t need to replace everything overnight. Begin with a versatile set of 3-5 medium-sized rectangular containers. This is enough for a few days of lunches and will let you experience the workflow firsthand.
- Prioritize a Quality Seal: When comparing brands, pay close attention to the lids. A robust locking system and a thick, well-seated silicone gasket are non-negotiable for a leak-proof experience.
- Read the Box: Before you buy, confirm the packaging explicitly states “borosilicate glass” and check the temperature ratings (e.g., “Oven safe to 450°F”). This guarantees you’re getting the thermal performance you need.

- Vegan Freezer Cooking Simplifies Healthy Meals on Busy Nights - June 17, 2026
- Vegetarian Freezer Recipes for Effortless Meal Prep and Delicious Dinners - June 16, 2026
- Vegan Recipes to Freeze for Effortless Weeknight Dinners - June 15, 2026