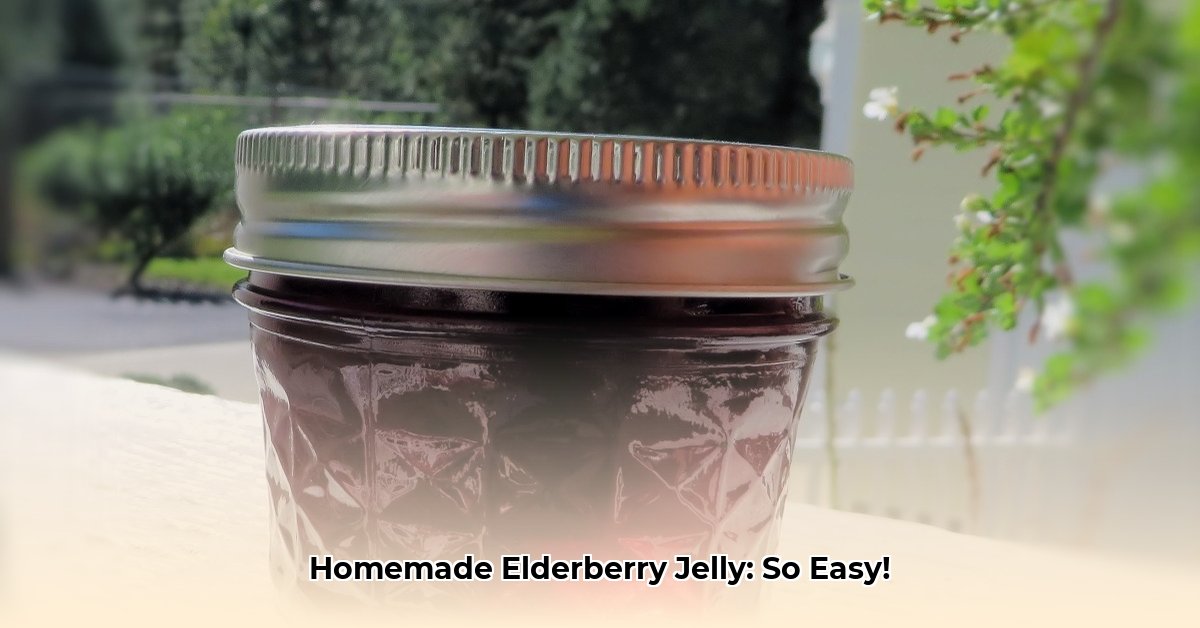
Making elderberry jelly is easier than you think! This guide walks you through two ways to make it: one using pectin (for a guaranteed set), and one without (for a more natural result). We’ll cover everything from picking the best berries to safely canning your delicious creation, so you can enjoy homemade elderberry jelly all year long. We’ll even share some tips and tricks to avoid common mistakes, making the whole process simple and fun. For another great recipe, check out this elderberry jam recipe.
Elderberry Jelly Recipe: A Homemade Canning Guide
Let’s dive into making delicious elderberry jelly! This guide walks you through two methods – one using pectin (a gelling agent) and one without, letting you choose the approach that best suits your skill level and preferences. Get ready to transform those tart elderberries into a sweet, spreadable treat using these elderberry jelly recipes!
Elderberry Jelly with Pectin: The Easy Route
This recipe uses pectin for a nearly foolproof result. It’s perfect for first-timers or anyone who wants a guaranteed set and an easy canning experience.
Ingredients:
- 4 cups strained elderberry juice (see instructions below for straining)
- 5 1/2 cups granulated sugar
- 1 box powdered pectin (1.75 oz, like Sure-Jell or Ball Classic Pectin)
- 1/4 cup fresh lemon juice (this helps with setting and adds a bright flavor)
- 1 teaspoon butter (optional, to reduce foaming)
Equipment:
- Large saucepan (stainless steel or enamel-coated)
- Fine-mesh sieve or cheesecloth-lined colander
- Canning jars (half-pint or pint)
- New canning lids and rings
- Jar lifter
- Canning funnel
- Water bath canner
Instructions:
-
Prep the Elderberries: Rinse your elderberries thoroughly under cool water. Carefully remove any stems and discard any berries that are underripe, damaged, or discolored. A little extra care here makes a big difference in the final taste of your homemade elderberry jelly.
-
Juice Extraction: Place the elderberries in a large stainless steel or enamel-coated saucepan and add just enough water to cover the bottom of the pan – about 1/2 cup. Simmer gently over medium-low heat for about 20-30 minutes, gently mashing with a potato masher occasionally to release the juice. This slow simmering helps extract maximum flavor without burning the berries. Stir frequently to prevent sticking.
-
Strain the Juice: Once the berries have softened, let the mixture cool slightly. Line a fine-mesh sieve or colander with two layers of cheesecloth or a jelly bag. Pour the elderberry mixture into the lined sieve and let the juice drain through. This might take a little time, but it’s important to get as much pulp and seeds out as possible for a clear jelly. Avoid squeezing the cheesecloth excessively, as this can make the jelly cloudy. Discard the solids.
-
Combine Ingredients: Measure exactly 4 cups of elderberry juice into a large, heavy-bottomed stainless steel or enamel-coated saucepan. Whisk in the powdered pectin until well combined. Add the lemon juice and butter (if using). This prevents lumps from forming later on.
-
The All-Important Boil: Bring the mixture to a full rolling boil over high heat, stirring constantly. A “full rolling boil” means a boil that doesn’t stop bubbling when stirred. Maintain a vigorous boil for exactly one minute, stirring continuously. This is crucial for activating the pectin and ensuring your jelly sets properly.
-
Skimming and Jarring: Remove the saucepan from the heat. Quickly skim off any foam that accumulates on the surface of the boiling mixture using a metal spoon. Using a canning funnel (highly recommended!), carefully ladle the hot jelly into sterilized canning jars, leaving about 1/4-inch of headspace at the top of each jar. This headspace allows for expansion during the canning process. Wipe the jar rims clean with a damp cloth.
-
Water Bath Canning: Center the lids on the jars and screw on the bands until they are fingertip tight. Carefully place the filled jars into a boiling water bath canner fitted with a rack. Ensure the jars are fully submerged in boiling water by at least 1 inch. Process half-pint or pint jars for 10 minutes, starting the timer once the water returns to a rolling boil. If you live at an altitude of 1,000 feet or more, increase the processing time according to USDA guidelines.
-
Cool Down and Seal Check: Remove the jars from the canner using a jar lifter and let them cool completely on a towel-lined surface, undisturbed, for 12-24 hours. You should hear a satisfying “pop” as the lids seal. Check each jar to confirm a good seal – the center of the lid should be slightly depressed and not flex when pressed. If any jars haven’t sealed, refrigerate those and use them within a few weeks.
Elderberry Jelly Without Pectin: The All-Natural Challenge
This recipe relies entirely on the natural pectin in very ripe elderberries, creating a jelly with a unique, potentially more rustic texture and allowing you to make elderberry jelly without pectin. It requires closer attention to detail but yields a rewarding product made with fresh elderberries.
Ingredients:
- 6 cups strained elderberry juice (from very ripe berries – this is essential!)
- 6 cups granulated sugar (adjust based on berry ripeness and your preferred sweetness level) – You might need more if the berries have low natural pectin.
- 1/4 cup fresh lemon juice
- 1 teaspoon butter (optional, to reduce foaming)
Equipment:
- Large saucepan (copper is ideal, but stainless steel or enamel-coated will work)
- Fine-mesh sieve or cheesecloth-lined colander
- Canning jars (half-pint or pint)
- New canning lids and rings
- Jar lifter
- Canning funnel
- Water bath canner
- Candy thermometer
- Small plates for testing
Important Considerations:
- Berry Ripeness: Use fully ripe, dark purple elderberries. Underripe berries lack pectin.
- Copper Pan (Optional): A copper pan helps with pectin development and color, but it’s not essential.
- Plate Test: This is the key to determining doneness.
Instructions:
Steps 1-3 are the same as the pectin recipe (using very ripe berries).
-
Combining and Boiling: Combine the strained elderberry juice, sugar, lemon juice, and butter (if using) in a large saucepan. Bring the mixture to a rolling boil over medium-high heat, stirring constantly. A longer boil is likely needed here; you may need to boil for 20-45 minutes, or even longer, depending on your berries and the pan you’re using. Use a candy thermometer to monitor the temperature – you’re aiming for 220°F (104°C).
-
The “Plate Test”: To determine doneness, place a small spoonful of the hot jelly onto a chilled plate. Let it sit for a minute. Push the jelly gently with your finger. If it wrinkles or forms a skin, it’s ready. If it’s still too runny, continue boiling and testing every few minutes.
-
Skimming and Jarring: Remove from heat. Skim off any foam. Follow steps 6-8 from the pectin recipe for skimming, jarring, processing, and cooling.
Canning and Safety: A Crucial Reminder
Safe canning practices are paramount when creating elderberry jelly for long-term storage!
-
Sterilize Everything: Always sterilize your jars and lids properly before filling them with hot jelly. Wash jars, lids and bands in hot, soapy water. Rinse well. Place jars upright on a rack in a boiling water canner. Fill the canner and jars with water to 1 inch above the tops of the jars. Bring water to a boil and boil for 10 minutes. Reduce heat and keep jars hot until ready to fill. Place lids in a small saucepan; cover with water and simmer for 10 minutes. Keep lids hot until ready to use.
-
Headspace is Essential: That 1/4-inch headspace is not negotiable. It allows for expansion during processing and prevents the lids from buckling.
-
Processing Time is Key: Always follow the given processing time precisely. Under-processing can lead to spoilage. Adjust processing time for altitude.
-
Check Your Seals: Once the jars have cooled, check each one to ensure a proper seal. If a lid is still loose or doesn’t make that satisfying “pop” sound, you’ll need to refrigerate it and consume it sooner rather than later.
Troubleshooting Tips
-
My Jelly Isn’t Setting (Pectin Recipe): This is usually due to insufficient pectin or sugar, or not reaching a full rolling boil for the specified time. If it’s still delicious, don’t despair! Store it in the refrigerator and enjoy it as a thick sauce or syrup, perhaps topping for pancakes, waffles, or yogurt. Adding a bit more lemon juice during reprocessing can sometimes encourage setting.
-
My Jelly Isn’t Setting (No-Pectin Recipe): This is common! It means the berries didn
- Borosilicate Glass Food Storage Containers Bring Durable Safety To Your Kitchen - January 22, 2026
- Microwave Safe Glass Containers for Durable Everyday Food Prep - January 21, 2026
- Borosilicate Glass Containers Offer Superior Food Storage and Meal Prep - January 20, 2026
