Ready to grow your family? Knowing when you ovulate is a crucial step, and luckily, there are easy tests you can do at home. This guide will lead you through everything you need to know about at-home ovulation tests, from picking the right kit to understanding the results and using helpful apps. We’ll keep it simple, so you can feel confident and in control as you try to conceive. Whether you’re just beginning your journey or have been trying for a while, this guide will give you the knowledge and tools to boost your chances of getting pregnant. Note that ovulation can sometimes cause fatigue; learn more about ovulation fatigue. Let’s work together to make your dream of becoming a parent a reality!
Unlock Your Fertility: Mastering At-Home Ovulation Tests
Want to optimize your chances of getting pregnant and better understand your reproductive health? Understanding your ovulation cycle is key, and thankfully, it’s easier than ever with accessible, at-home ovulation tests. This guide will walk you through everything you need to know – from choosing the right ovulation test kit to interpreting the sometimes confusing results and troubleshooting any hiccups along the way. We’ll also explore integrating ovulation tests with fertility apps, understanding LH surge patterns, and other optimization strategies for improving your chances of conception. Let’s get started on this exciting journey!
Understanding How At-Home Ovulation Tests Work: Maximizing Pregnancy Chances
Getting pregnant hinges on timing; you need to have sex around the time you release an egg (ovulation). At-home ovulation tests make pinpointing this fertile window much simpler. These tests detect a hormone surge – the luteinizing hormone (LH) – that happens just before ovulation. Think of it as your body’s “game on!” signal. Your body produces more LH just before releasing an egg, and the test detects this increase in your urine. It’s like having a tiny, super-sensitive hormone detector in your bathroom! A simple color change on the test strip tells you when your body is getting ready for ovulation. Understanding how these tests work and what the results mean is essential for accurately predicting your fertile window.
Choosing the Right At-Home Ovulation Test: Sensitivity and Accuracy
With so many ovulation tests available, choosing the right one might seem daunting. But don’t worry, it’s simpler than you think. Look for these key characteristics to find the best fit for you:
-
Sensitivity: This measures how well the test detects even tiny amounts of the LH hormone. A more sensitive test is better at picking up smaller increases in LH, meaning more accuracy in detecting your ovulation window. Consider tests that detect lower LH levels if you suspect you have a shorter surge.
-
Accuracy: How reliably does it give you the correct information? Look for tests with high accuracy ratings and positive user reviews. These ratings often reflect the test’s reliability in giving consistent and accurate results even with variations in hydration levels.
-
Ease of Use: Some tests require dipping in a cup, while others allow you to test directly in the urine stream. Consider which method is most convenient and comfortable for you. Digital tests can eliminate the guesswork of interpreting lines.
-
Reviews: Before you buy, take a look at what other users say! Online reviews provide real-world feedback on a test’s ease of use, clarity of results and overall reliability. Positive reviews from many users suggest a trustworthy test.
Many reliable brands, such as Easy@Home and Clearblue, are available, so you have plenty of choices! Do a quick online search or ask your doctor or pharmacist for recommendations to find the right test for you. Ultimately, choosing a test that aligns with your needs will optimize your fertility awareness and conception planning.
Step-by-Step Guide to Using Your At-Home Ovulation Test: Best Practices
Follow these easy steps for accurate results, which will have a meaningful impact on your path to pregnancy:
Step 1: Gather Your Supplies: You’ll need your ovulation test, a clean, dry cup (if required), and a timer. Make sure you carefully read the instructions included with your specific test kit, as steps might slightly vary between brands.
Step 2: Timing is Everything: The best time to test is usually between 10:00 AM and 8:00 PM, as LH levels tend to be highest during these hours. Avoid using your first morning urine sample, as the hormone concentration might not be as accurate at that time. Consistency in your testing time is also important throughout your cycle.
Step 3: Collect Your Urine Sample: If your test requires it, simply pee into the clean cup. Don’t worry about getting the perfect amount; the tests are designed to work with a small amount of urine.
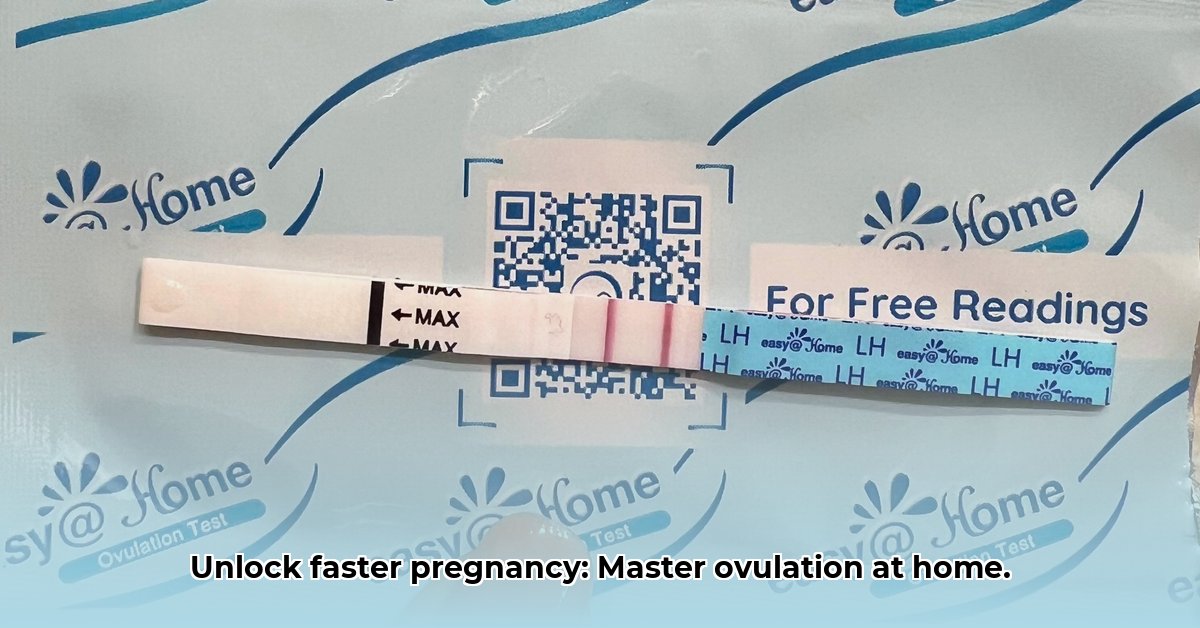
Step 4: Perform the Test: Carefully follow the specific instructions included with your test kit. This generally involves dipping a test strip into your urine sample for the specified amount of time. Ensure the absorbent tip is submerged to the “MAX” line.
Step 5: Read the Results: Once the required time has passed, compare the test line to the control line. If the test line is as dark as or darker than the control line, congratulations! This indicates a positive result – you’re likely to ovulate within 24-36 hours. For digital tests, the result will be displayed on the screen.
Interpreting Your Results: Understanding the Signals and Hormone Levels
Let’s decode those lines and their potential meaning! Remember to always refer to the specific instructions that came with your test, as interpretations can vary slightly.
-
Positive Result (Dark Line): If the test line is as dark as or darker than the control line, your LH surge is detected, signaling that ovulation is likely to occur very soon (within 24-36 hours). This is your cue to start trying to conceive! Note that a positive test doesn’t necessarily indicate your LH peak day so you’ll want to keep testing.
-
Negative Result (Faint Line or No Line): A faint line or no line suggests that an LH surge hasn’t happened yet. Continue testing daily, especially as you approach your predicted ovulation window.
-
Inconsistent Results: Getting inconsistent results? Don’t panic! Several factors can affect your results, including hydration levels and the timing of your test. Make sure to drink a consistent amount of water throughout your day and test around the same time each day. If you’re still seeing inconsistent results after a few days, it might be helpful to contact your healthcare provider.
Optimizing Your At-Home Ovulation Test Use: Test Frequency and LH Surge Patterns
The frequency of testing depends on your unique body’s patterns, and the type of LH surge you experience. Some women experience a gradual increase, while others have a more rapid LH surge.
-
Gradual Surge: If you notice a gradual increase over a few days, testing once daily might be sufficient. Remember, consistency is key. Start testing several days before your predicted ovulation day.
-
Rapid Surge: When you notice a quick surge in hormone levels, testing twice-daily is recommended. Testing more often increases the chance of capturing the surge’s peak.
To maximize your chances of detecting the surge, start testing a few days before your predicted ovulation day. Using a fertility tracking app can help estimate and predict this critical window. An LH surge is easily detected if it reaches the standard cutoff of 25-45 mIU/mL (a T/C ratio of 1.0 or above). However, when the LH surge doesn’t reach the standard average cutoff level, meaning the test line isn’t as dark as or darker than the control line, it’s possible you may still ovulate. Remember, you’re simply looking for the last, darkest day on your ovulation tests.
Did you know that optimizing ovulation test use can increase your chances of pregnancy?
Integrating with Fertility Tracking Apps: A Powerful Combination
Fertility tracking apps, like Premom, are a fantastic tool to support your ovulation testing efforts. These apps use your cycle information and test results to predict ovulation, helping you understand your body’s rhythms more effectively and precisely time intercourse. These apps make it easy to track your progress over time, highlighting patterns in your cycle and improving your ability to anticipate your most fertile days. They also often allow you to photograph and digitally record your test results, providing a visual record of your LH progression. According to a study published in the Journal of the American Medical Informatics Association, women who use fertility tracking apps are more likely to conceive within six months. A positive ovulation test shows a T/C ratio above 1.0 or higher on the Premom app. If your LH level ratios never reached 1.0 in the previous cycle, Premom adjusts its predictions in the following cycle to look for a positive when greater than 0.5.
Troubleshooting Common Problems: Avoiding Mistakes
Even with the best of intentions, some common hurdles might occur:
-
Faint Lines: Sometimes, a faint line is seen. If you’re unsure, perform another test in the next few hours, or contact your healthcare provider to ensure you are following the correct testing protocol. Remember, you’re looking for a line as dark or darker than the control line to indicate a positive result.
-
Inconsistent Results: Keep in mind that things like changes in your hydration level can impact the results. Ensure consistent hydration throughout the day. Also, ensure you are following the instructions carefully and using the right collection and testing methods. Ensure you test after your period ends so you don’t miss your LH surge.
If you’re consistently experiencing problems, consulting

- Stainless Steel Food Storage for Healthier, Eco-Friendly Meal Prep - February 27, 2026
- Stainless Food Containers Offer Durable Storage for Everyday Meals - February 26, 2026
- Stainless Steel Containers Offer Superior Food Preservation and Durability - February 25, 2026