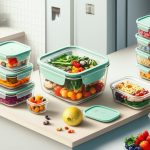
The secret to a perfect packed lunch isn’t just the box itself—it’s the bento tray inside that truly brings order to culinary chaos. This single component transforms a simple container into a powerful tool for portion control, food separation, and beautiful presentation, ensuring your carefully prepared meal arrives exactly as you intended. Whether you’re packing sushi rolls that need to stay pristine or keeping crunchy granola away from creamy yogurt, the right tray is the unsung hero of on-the-go dining.
At a Glance: Your Guide to Mastering the Bento Tray
- Understand the Core Function: Learn how a bento tray is the organizational engine within a bento box, designed for separation and presentation.
- Choose the Right Material: Compare the pros and cons of common materials like BPA-free plastic, flexible silicone, and durable stainless steel.
- Match Compartments to Your Meals: Discover how different layouts—from two to six compartments—are tailored for specific food types, from salads to snack platters.
- Pack Like an Expert: Get practical, step-by-step tips to prevent leaks, maintain food texture, and create visually stunning meals.
- Avoid Common Pitfalls: Find answers to frequent questions about microwaving, cleaning, and ensuring your tray is truly leakproof.
The Bento Tray: More Than Just a Plastic Insert
Many people use “bento box” and “bento tray” interchangeably, but specialists see a crucial distinction. The bento box is the complete system—the outer shell, lid, and locking mechanism. The bento tray is the removable, compartmentalized insert that sits inside. It’s the heart of the bento, dictating how your food is organized, separated, and presented.
Think of the outer box as the vehicle and the tray as the sophisticated seating and cargo arrangement inside. This modular design is a key feature. A single outer box might be compatible with multiple tray layouts, allowing you to switch from a five-compartment snack tray one day to a three-compartment entree-and-sides tray the next.
This separation of components is fundamental to finding the perfect meal container. While the outer shell provides structure and a seal, the tray’s design directly impacts your daily meal prep. Understanding the options available is the first step. If you’re just starting to explore this world of organized eating, it’s helpful to understand the full system first. Find Your Ideal Bento Box to see how different trays fit into the larger container ecosystem.
Decoding Tray Materials: Function Follows Form
The material of your bento tray dictates its durability, weight, cleaning process, and what foods it can safely hold. Each has distinct advantages and is suited for different lifestyles.
| Material | Key Benefits | Best For | Things to Consider |
|---|---|---|---|
| BPA-Free Plastic | Lightweight, affordable, often microwave & dishwasher safe. Widely available in many configurations. | Everyday work/school lunches, kids’ meals, general-purpose use. | Can stain with pigmented foods (e.g., tomato sauce). Prone to scratching over time. |
| Stainless Steel | Extremely durable, non-staining, non-porous (no odors). Excellent for keeping food cold. | Salads, cold pastas, fruits, deli-style lunches. A long-term, sustainable option. | Cannot be used in the microwave. Generally heavier and more expensive. |
| Silicone | Flexible, non-stick, and easy to clean. Often collapsible or available as individual cups for ultimate customization. | Baking small portions directly in the tray, packing sticky items, creating custom dividers within a larger box. | Can sometimes retain strong odors (like garlic). Not as rigid as plastic or steel. |
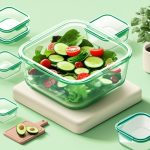
| Glass | Non-porous, won’t stain or retain odors. Microwave, dishwasher, and oven safe. | Reheating leftovers perfectly, avoiding plastic contact with food. | Heavy, fragile, and not ideal for young children or commuting without a protective bag. |
| A Practical Snippet: A busy parent might choose a BPA-free plastic tray for their child’s daily lunch due to its light weight and durability. Meanwhile, an office worker who meal-preps salads for the week might invest in a stainless steel tray to keep greens crisp and fresh without worrying about dressing staining the container. |
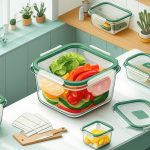
Finding Your Perfect Layout: How Many Compartments Do You Really Need?
The magic of the bento tray lies in its compartments. The layout you choose should directly reflect the types of meals you pack most often.
The Minimalist: Two to Three Compartments
This classic layout is perfect for a simple, balanced meal. It encourages the “main, side, and smaller side” approach.
- Large Compartment: For the main course—a sandwich, a generous salad, sushi rolls, or a pasta dish.
- Smaller Compartments: Ideal for fruit, a side of vegetables with dip, a small portion of nuts, or a dessert.
- Case in Point: Pack grilled chicken and quinoa in the large section, roasted broccoli in a medium section, and a handful of berries in the smallest one. The dividers keep the berry juice from making the broccoli soggy.
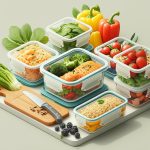
The Grazer: Four to Five Compartments
If you love variety and snack-style lunches, a tray with more compartments is your best friend. This layout is fantastic for building “adult Lunchables,” deconstructed meals, or a tapas-style spread.
- Structure: Typically one or two medium-sized compartments with several smaller ones.
- Ideal Foods: Crackers, cheese cubes, deli meat, olives, various veggies, hummus, a hard-boiled egg, and a small sweet treat.
- Case in Point: A five-compartment tray could hold pita triangles, hummus, cucumber slices, feta cheese, and a couple of dates. Each item stays separate, fresh, and ready to be combined at lunchtime. Restaurantware notes these layouts are excellent for keeping “sushi rolls and keep them intact while commuting.”
The Specialist: Single Compartment & Custom Inserts
Sometimes, you need one large, uninterrupted space. A single-compartment tray is designed for meals that shouldn’t be separated, like soups (in a leakproof box), large salads, or noodle dishes.
To get the best of both worlds, use silicone cups or dividers within a single-compartment tray. This gives you modular control, allowing you to create temporary sections for sauces, dips, or small sides that can be removed as needed.
A Practical Playbook for Packing Your Bento Tray
Knowing how to pack your tray is as important as choosing the right one. These techniques will elevate your meal prep, ensuring food stays fresh, appetizing, and secure.
Step 1: Start with the “Dry” and Sturdy Items
Place the heaviest and least fragile foods at the bottom of the largest compartments. Think grains (rice, quinoa), pasta, or sturdy proteins like grilled chicken. This creates a stable base.
Step 2: Isolate the “Wet” Ingredients
Sauces, dressings, and wet fruits are the biggest culprits of the dreaded “soggy lunch.”
- Use Lidded Containers: For very liquid items like salad dressing or soy sauce, use a small, dedicated lidded container that fits inside a compartment.
- Leverage Silicone Cups: A silicone muffin liner is perfect for holding yogurt, applesauce, or hummus. It contains the moisture and can be easily removed.
- Create Natural Barriers: Use a sturdy vegetable like a cucumber spear or a carrot stick to build a small wall between a semi-wet item and a dry one, like crackers.
Step 3: Pack Tightly to Prevent Shifting
A common mistake is leaving too much empty space. Food that can slide around during transit is more likely to get bruised or mixed. - Fill the Gaps: Use small, space-filling foods to secure everything. Cherry tomatoes, grapes, nuts, or even a small piece of dark chocolate can be tucked into empty corners.
- The Lettuce Leaf Trick: Line a compartment with a large lettuce leaf before adding a salad or sandwich. It acts as an edible, protective barrier.
Step 4: Consider Temperature and Texture
Think about how foods will taste and feel after several hours. - Keep Crunchy Things Crunchy: Pack crackers, croutons, or granola in their own separate, dry compartment. Don’t let them touch anything with moisture.
- Hot vs. Cold: If you plan to microwave part of your meal, ensure it’s in a microwave-safe tray and isolated from items you want to keep cold, like a fresh side salad. Some bento boxes come with insulated sections for this very purpose.
Quick Answers to Common Bento Tray Questions
Q: Are all bento trays leakproof?
No. This is a critical distinction. The bento box lid provides the main seal. The dividers within a bento tray are primarily for organization, not for containing liquids. Some high-end models have silicone-lined dividers that press against the lid to create a seal for each compartment, but this isn’t standard. Always pack true liquids like soup or dressing in a separate, fully sealed container.
Q: Can I put my bento tray in the microwave or dishwasher?
It depends entirely on the material.
- BPA-free plastic: Most are top-rack dishwasher safe and microwave safe (check the bottom for symbols). Avoid microwaving with oily or tomato-based sauces, as they can cause pitting and staining.
- Stainless steel: Dishwasher safe, but never put it in the microwave.
- Silicone: Microwave and dishwasher safe.
- Glass: Microwave and dishwasher safe.
Q: How do I get rid of stains and smells from my plastic bento tray?
For tomato stains, try leaving the tray in direct sunlight for a few hours—the UV rays can help break down the pigment. For lingering smells like garlic or curry, make a paste of baking soda and water, coat the inside of the tray, and let it sit for several hours before washing.
Q: My food gets mixed up anyway. What am I doing wrong?
You are likely not packing tightly enough. The key is to fill each compartment so there’s minimal room for items to move during transport. Use the gap-filling tricks mentioned above (nuts, small fruits) to wedge everything in place securely.
Make Your Choice: The Right Tray for Your Lifestyle
Ultimately, the perfect bento tray is an extension of your eating habits. Don’t get caught up in finding one tray that does everything. Instead, focus on the one that solves your most common meal-packing challenge right now.
Start by identifying your primary goal: Is it portion control? Transporting complex salads? Packing fun, varied lunches for your kids?
- If you want simple, balanced meals: A 3-compartment plastic or stainless steel tray is your reliable workhorse.
- If you love variety and snacking: Opt for a 4- or 5-compartment tray to keep all your bits and pieces perfectly organized.
- If you need maximum flexibility: A large, single-compartment box paired with a set of silicone cups gives you a blank canvas to customize daily.
By focusing on the tray’s design, material, and layout, you move beyond just buying a lunchbox. You’re investing in a system that makes healthy, appealing, and organized meals an effortless part of your daily routine.

- Borosilicate Containers Keep Food Fresh and Your Kitchen Organized - January 24, 2026
- Borosilicate Glass Storage Containers Handle Extreme Temperatures Safely - January 23, 2026
- Borosilicate Glass Food Storage Containers Bring Durable Safety To Your Kitchen - January 22, 2026