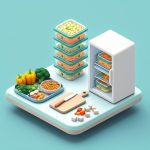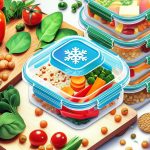
That sad, soggy lunch salad you packed with good intentions? It’s a tragedy we can all prevent. The culprit isn’t your recipe; it’s the container. Throwing everything together in a single-space box is a recipe for disaster, turning crisp greens into a wilted mess and crunchy toppings into mush. This is precisely where compartment food containers change the entire game, turning meal prep from a chore into a system that actually works.
They are the simple, elegant solution to keeping foods separate, fresh, and perfectly portioned until the moment you’re ready to eat.
At a Glance: Your Container Upgrade
This guide will give you the practical knowledge to choose and use the right divided containers for your lifestyle. Here’s what you’ll walk away with:
- The Material Match: Deciding between glass, plastic, and stainless steel based on your daily needs, not just looks.
- Layout Logic: How to match the number of compartments to the types of meals you actually make.
- Packing Like a Pro: Simple techniques to prevent leaks, condensation, and sogginess for good.
- The Real-World Test: How to spot a quality container and avoid common pitfalls like warping lids and weak seals.
- Care and Longevity: Making your investment last, from stain removal on plastic to proper lid care.
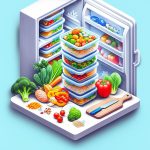
Not All Containers Are Created Equal
The sheer number of options can be overwhelming, but the choice really boils down to three core materials. Each has distinct advantages that make it perfect for certain situations and a poor fit for others. Thinking about how you’ll use them—reheating at the office, packing for a child, or taking a cold lunch on the road—is the first step.
While choosing the right container is a huge step, it’s just one part of a flawless meal prep strategy. Understanding how these tools fit into a complete weekly system is what truly saves you time and stress, which is why we call them Your meal prep secret weapon. Once you have your containers, you can build a powerful routine around them.
The Glass Standard: Clear, Clean, and Classic
Glass compartment food containers are the gold standard for anyone who prioritizes purity and reheating performance. Made from borosilicate or tempered glass, they offer a premium experience.
- Pros:
- Non-Porous: Glass won’t absorb food odors, flavors, or stains. Your tomato sauce will never leave a permanent orange ghost.
- Oven & Microwave Safe: Most glass bases can go directly from the fridge to the microwave or even the oven (always check manufacturer specs and never put a cold dish in a hot oven).
- Easy to Clean: The smooth surface is genuinely non-stick and cleans up beautifully in the dishwasher.
- Long-Lasting: With proper care, a glass container can last for years without degrading.
- Cons:
- Heavy: They add significant weight to a lunch bag, making them less ideal for commuters who walk a lot or for kids.
- Breakable: A drop on a hard floor can mean the end of your container and your lunch.
- Price: They typically come with a higher upfront cost than their plastic counterparts.
Best For: Office lunches you plan to reheat, storing leftovers at home, and packing acidic or strongly flavored foods.
The Plastic Workhorse: Lightweight and Versatile
Don’t dismiss plastic. Modern, high-quality, BPA-free plastic compartment food containers are incredibly practical and are often the most convenient choice for daily use.
- Pros:
- Lightweight: Easy to carry, stack, and pack in a bag without adding much bulk or weight.
- Durable: They won’t shatter if dropped, making them perfect for kids, travel, and general daily clumsiness.
- Affordable: You can typically buy a multi-pack of plastic containers for the price of one or two glass ones.
- Freezer-Friendly: Most are designed to go into the freezer without cracking.
- Cons:
- Can Stain & Retain Odors: That same tomato sauce or a curry dish might leave a lasting mark and scent.
- Potential for Warping: High heat in the dishwasher or microwave can cause the container or lid to warp, compromising the seal.
- Shorter Lifespan: Plastic can scratch and degrade over time, eventually needing replacement.
Best For: On-the-go meals, packing kids’ lunches, freezer meal prep, and anyone prioritizing portability and budget.
The Stainless Steel Option: Durable and Cool
Often associated with bento boxes, stainless steel offers a unique combination of durability and food safety that makes it a fantastic, albeit more specialized, choice.
- Pros:
- Virtually Indestructible: They are tough, corrosion-resistant, and will survive almost any abuse.
- Inert Material: Like glass, stainless steel won’t stain, rust, or hold onto odors.
- Temperature Retention: While not a vacuum-insulated thermos, steel can help keep cold foods like salads and fruit chilled for longer.
- Lightweight: Heavier than plastic but significantly lighter than glass.
- Cons:
- Not Microwave-Safe: This is the biggest drawback. You cannot put stainless steel in the microwave.
- Higher Cost: Premium stainless steel containers are often the most expensive option.
- Lid Quality Varies: Cheaper models may have leaky plastic lids, defeating the purpose of the durable base.
Best For: Cold lunches like salads, pasta salads, snack boxes, and deconstructed sandwiches. Excellent for school lunches where reheating isn’t an option.
| Feature | Glass | BPA-Free Plastic | Stainless Steel |
| :— | :— | :— | :— |
| Reheating | Excellent (Microwave/Oven) | Good (Microwave Only) | No |
| Durability | Low (Breakable) | High (Can warp) | Excellent (Unbreakable) |
| Weight | Heavy | Very Light | Light |
| Stain/Odor Resistance | Excellent | Fair to Good | Excellent |
| Best For | Office Reheating | Portability, Kids | Cold Meals, Salads |
| Price Point | Mid to High | Low to Mid | High |
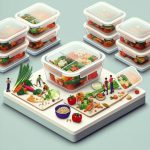
Matching the Layout to Your Lunch
Once you’ve settled on a material, the next critical step is choosing a layout. The number of compartments dictates what kind of meals you can pack effectively.
The 2-Compartment: The Simple Power Duo
This is your go-to for any “main and side” meal. The divider, often in a 60/40 or 70/30 split, is perfect for keeping a wet main from sogging up a dry side.
- Case Snippet: Mark preps grilled chicken breasts and roasted sweet potato wedges for the week. The 2-compartment container keeps the chicken juices from making the potatoes soft. Simple, effective, and clean.
- Perfect For: Salmon and asparagus, stir-fry and rice, meatballs and quinoa.
The 3-Compartment: The Balanced Meal MVP
This is arguably the most versatile layout and a favorite of seasoned meal preppers. It naturally encourages balanced meals by providing distinct spots for a protein, a carbohydrate, and a vegetable.
- Case Snippet: Sarah packs a deconstructed burrito bowl. The largest section holds shredded chicken, a smaller one holds black beans and corn, and the third holds brown rice. She adds toppings like salsa and cheese just before eating.
- Perfect For: The classic “protein, carb, veggie” combo, DIY lunchables (crackers, cheese, deli meat), or a main with two small sides.
The 4+ Compartment: The Snack and Bento Specialist
For those who love variety or need to pack multiple small items, containers with four or more small compartments are ideal. They are the ultimate tool for “snack boxes” or intricate bento-style lunches.
- Case Snippet: For her toddler, David uses a 5-compartment container. It holds cheese cubes, grapes (cut in half), a small handful of goldfish crackers, a few slices of turkey, and a dollop of hummus for dipping. Everything stays separate and appealing.
- Perfect For: Trail mix components, veggie sticks with dip, fruit medleys, or a “tasting platter” style lunch.
A Practical Playbook for Packing and Care
Owning the best compartment food containers is only half the battle. Using them correctly ensures your food tastes as good as it did when you made it.
How to Pack for Maximum Freshness
- Cool Everything Down: This is the most important rule. Sealing hot food in an airtight container creates steam, which then condenses into water. This water will make everything from breading to roasted vegetables soggy. Let food cool on the counter for at least 20-30 minutes before lidding.
- The Wet-Dry Divide: Be strategic. Place wet ingredients like sauces, dressings, or juicy fruits in their own compartment, as far away from crisp, dry ingredients (like croutons, crackers, or nuts) as possible.
- Use Silicone Liners: For extra division within a single compartment, silicone muffin or baking cups are a brilliant, reusable hack. Use them to hold a handful of berries, a serving of nuts, or a sauce.
- The Salad Savior: Never dress your salad in advance. Use a container with a dedicated, sealed dressing pot or pack it separately. Add it right before you toss and eat.
Keeping Your Containers in Top Shape
- Fighting Plastic Stains: For stubborn tomato or curry stains on plastic, make a paste of baking soda and water. Smear it over the stain, let it sit for a few hours (or overnight), and then wash as usual. Sunlight can also help “bleach” the stains out.
- Eliminating Odors: If a container smells like last week’s garlic chicken, fill it with a 50/50 solution of white vinegar and water and let it soak for an hour before washing.
- The Lid and Gasket Check: The silicone gasket inside the lid is what makes it leak-proof. Periodically, gently pull it out and clean the groove underneath, as gunk can build up and compromise the seal. Let it dry completely before reinserting.
- Dishwasher Best Practices: For plastic containers, always use the top rack. The heating element is at the bottom and can be intense enough to warp the plastic, ruining the container’s shape and seal.
Quick Answers to Common Questions
Here are some rapid-fire answers to the most frequent questions about using compartment food containers.
Q: Are glass compartment food containers really better than plastic?
A: “Better” is subjective. Glass is superior for non-staining, non-odor retention, and reheating in an oven. Plastic is superior for portability, durability (it won’t break), and affordability. The best choice depends entirely on your primary use case. Many people own both for different needs.
Q: Can I put all compartment food containers in the microwave?
A: Absolutely not. Never put stainless steel in a microwave. For glass, the base is almost always microwave-safe, but check the lid—some plastic lids are not and should be removed. For plastic containers, look for a “microwave-safe” symbol (usually wavy lines). If it’s not there, don’t risk it.
Q: How do I stop my sauces and dressings from leaking into other compartments?
A: First, invest in a container with a high-quality, tight-fitting lid that features a silicone gasket. The dividers should go all the way up to the lid to create a seal for each section. For truly liquid items like vinaigrette, the safest bet is always a dedicated, screw-top dressing pot that fits inside a larger compartment.
Q: Are the expensive, name-brand compartment food containers worth the money?
A: Often, yes. The extra cost usually goes toward better design and materials. This translates to more reliable snap-lock lids that don’t break, thicker silicone gaskets that create a truly leak-proof seal, and more durable materials (stronger glass, higher-grade plastic) that resist warping and cracking. A cheap multi-pack might seem like a deal, but if half the lids break or leak within a month, it’s a false economy.
Your Next Step to Flawless Meal Prep
Choosing the right container isn’t just about storage; it’s about designing a better, easier, and more enjoyable eating experience. By moving past the one-size-fits-all box, you unlock a world of meal prep possibilities where every ingredient stays distinct and delicious.
To get started, make a simple choice based on your most common need:
- If you reheat lunch at your desk and hate stains: Start with a 2 or 3-compartment glass container.
- If you’re always on the move or packing for kids: A set of quality, BPA-free 3-compartment plastic containers is your most practical first step.
- If your go-to lunch is a big, fresh salad: Prioritize a container (plastic or steel) with a separate, sealed dressing pot.
Mastering your tools is the first step toward mastering the system. Pick one, try it for a week, and watch how a simple divider transforms your daily lunch from an afterthought into something to look forward to.

- Master Vegan Freezer Meal Prep to Simplify Your Busy Schedule - June 18, 2026
- Vegan Freezer Cooking Simplifies Healthy Meals on Busy Nights - June 17, 2026
- Vegetarian Freezer Recipes for Effortless Meal Prep and Delicious Dinners - June 16, 2026