Eating enough clean calories to build muscle can feel like a full-time job. The constant cycle of cooking, eating, and cleaning is exhausting, often leading to skipped meals or resorting to junk food. This is where a smart, easy bulking meal prep strategy transforms your entire approach, turning a daily chore into a powerful, once-a-week ritual that guarantees you hit your macros and fuel consistent growth.
Forget spending your entire Sunday chained to the stove. We’re breaking down a streamlined system that makes gaining mass efficient, affordable, and delicious.
At a Glance: Your Takeaways
- The 4-Step Prep Framework: Learn a simple, repeatable process for planning, shopping, cooking, and storing your bulking meals.
- Component Prepping vs. Full Meals: Discover which method best fits your lifestyle to maximize variety and minimize food fatigue.
- Bulking Kitchen Essentials: Get a clear list of staple ingredients and basic gear you need for success.
- Actionable Cook-Up Plan: See a real-world example of how to prep five days of high-protein lunches and dinners in under two hours.
- Troubleshooting Common Issues: Get quick answers to problems like meal boredom, food storage, and time constraints.
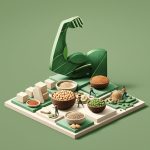
More Than Just Tupperware: The Strategic Edge of Meal Prep
Bulking effectively isn’t just about eating more; it’s about eating the right things consistently. The goal is a moderate caloric surplus from nutrient-dense foods—a “clean bulk”—to maximize muscle gain while minimizing fat storage. Meal prep is your single greatest tool for achieving this.
Without a plan, it’s easy to fall short of your calorie and protein targets or give in to the “dirty bulk” of high-calorie, low-nutrient junk food. Prepping your meals gives you absolute control. You dictate the macros, you manage the portions, and you ensure your body gets the high-quality fuel it needs to repair and build muscle tissue after intense workouts.
Before You Cook: Know Your Bulking Blueprint
Before you chop a single onion, you need to know your numbers. Trying to meal prep without a target is like driving without a destination.
- Find Your Calorie Needs: Use a reliable online TDEE (Total Daily Energy Expenditure) calculator to estimate your daily maintenance calories. To bulk, add a moderate surplus of 300–500 calories to this number.
- Set Your Macros: A great starting point for muscle gain, as recommended by many nutrition coaches, is a macro split of 40% protein, 35% carbohydrates, and 25% fat.
- Track and Adjust: Use an app like MyFitnessPal to log your prepped meals for the first couple of weeks. Weigh yourself weekly. If your weight isn’t trending up by about 0.5-1 lb per week, add another 100-200 calories to your daily total.
Once you have these target numbers, you can build a meal plan that hits them precisely.
The Sunday Reset: Your 4-Step Bulking Prep Framework
This is the engine of your muscle-gaining machine. Dedicate 90-120 minutes once a week to this ritual, and you’ll be set for the demanding week ahead.
Step 1: Plan Your Menu (The Smart Way)
The biggest mistake people make is overcomplicating the menu. You don’t need a different gourmet meal every day. Simplicity is key to consistency.
Start by choosing just two or three core recipes for the week: one for your lunches and one or two for your dinners. This simplifies your shopping list and your cooking process. You can find a fantastic list of ideas to pull from in this guide to Delicious muscle-gain lunch recipes. Don’t forget to plan for high-protein snacks like Greek yogurt, cottage cheese, or hard-boiled eggs.
- Pro Tip: Choose recipes that share ingredients. If you’re making a chili with ground beef and onions, maybe your other meal is a beef and sweet potato hash that also uses onions.
Step 2: Create a Master Shopping List
Walk into the grocery store with a mission. Organize your list by store section (Produce, Meat & Dairy, Pantry/Dry Goods) to save time and prevent impulse buys that don’t fit your macros. A well-stocked kitchen makes bulking prep nearly automatic.
Step 3: The Cook-Up (Batching for Efficiency)
This is where you choose your strategy. There are two highly effective methods for prepping your meals.
| Prep Method | How It Works | Best For |
|---|---|---|
| Full Meal Prep | You cook complete recipes (like a large batch of chili or enchiladas) and portion them directly into containers. | Maximum convenience. Grab-and-go simplicity. Best for recipes that taste even better the next day. |
| Component Prep | You cook individual ingredients in bulk: a tray of chicken breasts, a large pot of quinoa, roasted broccoli, etc. | Maximum variety. You can “assemble” different meals each day to avoid food boredom (e.g., chicken and quinoa bowl one day, chicken salad the next). |
| For a beginner, a hybrid approach works well. Make one “Full Meal” recipe (like the Sunday Night Chili below) and “Component Prep” a versatile protein like grilled chicken to use in different ways. |
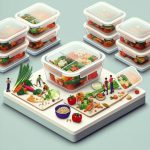
Step 4: Portion and Store Like a Pro
Your work isn’t done until everything is stored properly.
- Invest in Good Containers: Use glass or BPA-free plastic containers that are microwave and dishwasher-safe. A food scale is non-negotiable for accurately portioning your meals to hit your macros.
- Cool Before Sealing: Let food cool down for about 30 minutes before putting lids on and refrigerating. This prevents condensation and keeps food from getting soggy.
- Label Everything: Use a marker or tape to label each container with the meal name and the date it was made.
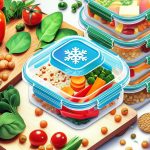
- The 4-Day Rule: Most cooked meals stay fresh in the refrigerator for up to 4 days. If you prep for more than 4 days, freeze the extra portions immediately. They’ll be perfectly fine to thaw and eat later in the week.
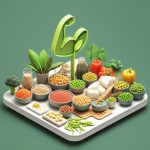
Stock Your Kitchen for Success: The Bulking Prep Pantry
Having these staples on hand makes planning and shopping a breeze.
- Lean Proteins:
- Chicken Breast or Thighs
- 90/10 or 93/7 Ground Beef or Turkey
- Salmon or Tilapia
- Eggs & Egg Whites
- Greek Yogurt (Plain)
- Cottage Cheese
- Complex Carbohydrates:
- Quinoa
- Brown or Jasmine Rice
- Sweet Potatoes
- Oats (Rolled or Steel-Cut)
- Whole-Wheat Pasta or Chickpea Pasta
- Canned Beans (Black, Kidney)
- Healthy Fats:
- Avocados
- Extra Virgin Olive Oil & Avocado Oil
- Nuts (Almonds, Walnuts)
- Nut Butters (Peanut, Almond)
- Seeds (Chia, Flax)
- Vegetables & Flavor:
- Onions, Garlic, Bell Peppers
- Broccoli, Spinach, Zucchini
- Canned Tomatoes, Tomato Paste
- Your favorite spices (paprika, cumin, chili powder, etc.)
- Low-sodium soy sauce, Sriracha, salsa
Putting It All Together: A Sample Prep Day in Action
Let’s walk through a real-world scenario. Alex needs to prep 5 lunches and 5 dinners for the week.
- Lunch Plan: Grilled Chicken and Quinoa Power Bowls
- Dinner Plan: Sunday Night Chili
Here’s how Alex gets it done in under two hours:
- 6:00 PM – Start the Grains: Get 2 cups of dry quinoa cooking on the stovetop. It will cook passively for about 15-20 minutes.
- 6:05 PM – Brown the Meat: In a large pot, start browning 3 lbs of lean ground beef with chopped onions and garlic for the chili.
- 6:15 PM – Grill the Protein: While the beef is browning, season 2.5 lbs of chicken breast with paprika, salt, and pepper. Cook on an indoor grill or in a hot pan until it reaches 165°F.
- 6:30 PM – Finish the Chili: The beef is browned. Drain the fat, add canned tomatoes, beans, corn, and chili powder. Stir, lower the heat, and let it simmer. The quinoa should be done by now; fluff it and set it aside to cool.
- 6:45 PM – Chop & Assemble: The chicken is cooked. Let it rest for a few minutes before slicing. While it rests, portion the cooked quinoa into 5 lunch containers. Top with spinach, cherry tomatoes, and sliced avocado. Add the sliced chicken.
- 7:15 PM – Portion the Second Meal: The chili has been simmering and the flavors have melded. Turn off the heat. Use a food scale to portion the chili evenly into 5 dinner containers.
- 7:30 PM – Cool, Store & Clean: Leave the lids off all 10 containers to cool on the counter. Do your dishes while they cool. Once at room temperature, seal them up and place them in the fridge. You’re done for the week.
Your Bulking Prep Questions, Answered
How do I avoid getting bored of the same meals?
This is the biggest challenge, and Component Prepping is the best solution. Cook a big batch of chicken, rice, and roasted veggies. On Monday, have it as a simple bowl. On Tuesday, shred the chicken and mix it with salsa and beans for a burrito bowl. On Wednesday, use the chicken in a salad with a different dressing. A variety of sauces, spices, and hot sauces are your best friend.
Can I use this system for a “dirty bulk”?
You can, but the main benefit of meal prep is health and macro control, which is the essence of a clean bulk. Prepping allows you to create calorie-dense meals that are also packed with nutrients, like adding olive oil, nuts, and avocado instead of relying on processed foods. This leads to higher quality muscle gain with less unwanted body fat.
What if I don’t have much time on Sunday?
Break it up! Use a slow cooker to make a big batch of pulled pork or chicken with minimal effort. While that cooks, you can roast some sweet potatoes in the oven. You can also split your prep: cook all your proteins on Sunday night and then cook a fresh batch of rice or pasta mid-week, which only takes 20 minutes.
Your First Easy Bulking Meal Prep Starts Now
The key to success is to stop overthinking and start doing. Don’t try to prep 21 perfect meals your first week. Start small, build the habit, and watch the results follow. Consistency trumps complexity every single time.
Your Quick Start Checklist:
- [ ] Calculate your target calories and macros.
- [ ] Pick ONE lunch recipe and ONE dinner recipe to make for the next 3-4 days.
- [ ] Write a simple, organized shopping list.
- [ ] Block out 90 minutes in your calendar this week.
- [ ] Put on some music, cook your food, and portion it out.
You now have a complete blueprint. Execute it, and you’ll spend less time stressing in the kitchen and more time fueling the muscle you’re working so hard to build in the gym.

- Master Vegan Freezer Meal Prep to Simplify Your Busy Schedule - June 18, 2026
- Vegan Freezer Cooking Simplifies Healthy Meals on Busy Nights - June 17, 2026
- Vegetarian Freezer Recipes for Effortless Meal Prep and Delicious Dinners - June 16, 2026